
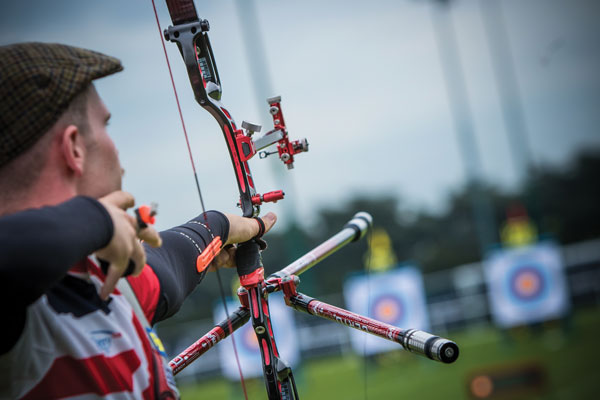
Your front hand does far more than just hold the bow up, says Patrick Huston, it plays a pivotal role in your shot execution and follow-through
Most beginner bows are designed to be comfortable grabbing them with your whole hand – but this is really not what we want to do
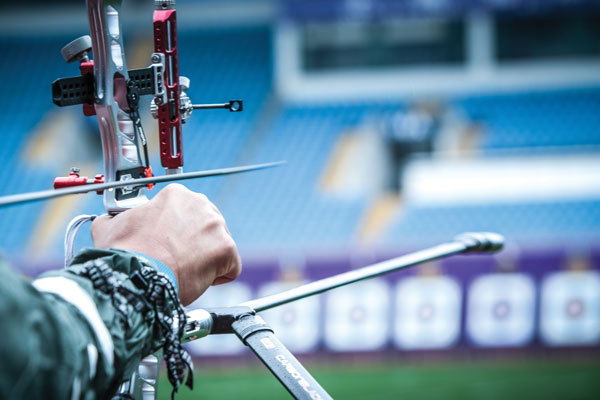
On the face of it the bow hand has one specific function; to push back against the bow while you pull the string. While this is all well and good, that does not give you any information as to what to actually do. Unfortunately, most beginner bows are designed to be comfortable grabbing them with your whole hand – but this is really not what we want to do and teaches bad habits which can last an entire career. In this article I want to explain how to create an accurate, consistent and powerful front hand.
Archery is the sport of repetition. We are repeating the action of shooting a bow. We have two interfaces with the bow: our string fingers and our bow hand. I want to explain to you what your bow hand should be doing and how to set it up consistently. I’ll start with some general principles, then get down to the specifics as to how to build it into your shot.
First Principle – Relaxation
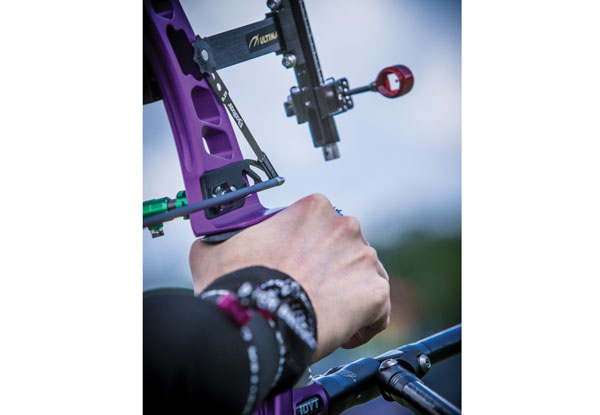
Tension in the front hand can affect your results – look out for white knuckles as one sign
One of the most important features of the bow hand is to have it relaxed. You do not want to be creating tension in your front hand though, trust me, most people are. Have a look and see how many white knuckles you can find. We want to have the hand, wrist and forearm as loose as we can. If the whole unit is tense then we will create minute tremors in our muscles, which amplify out into an unsteady sight picture and shaking.
Second Principle – Behind the bow
We need to be properly behind the bow. Many right-handed people have the pressure from their hand on the left side of the grip, and this means that there is a torque through their bow throughout the shot, resulting in worsening groups and contact between then string and arm guard. When putting your hand into the grip, you want to set the bone of the arm (the right one coming into the base of your thumb) coming in towards the right side of the grip. If you imagine the grip quartered, the pad of your thumb should be pressing on the mid line on the right-hand side. This can vary up and down depending on your grip shape, but it needs to be on the right side (for a right-hander).
Third principle – Front end follow through
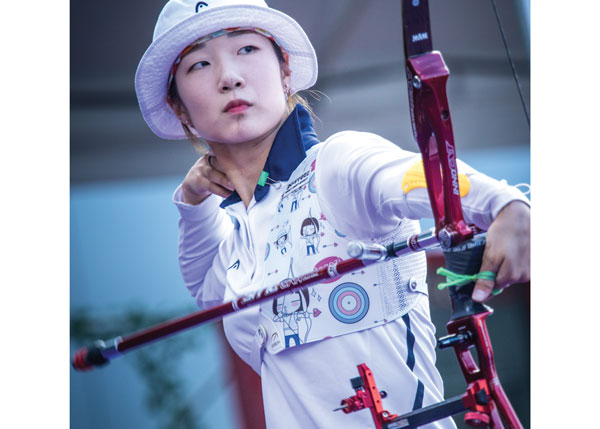
Korean archer Choi Misun is an example of an archer with a very aggressive follow-through
We need the bow to move away from us on relaxing the string fingers. Most archers are aware of the importance of making their loose really smooth and strong, and the first thing many a club coach will say to a new archer is you are forward loosing. However, the front hand is equally as important to follow through with. When we release the string we are giving direction to the arrow, and we must do the same with the front hand. Instantaneously as the clicker drops there must be force within the front end to push the bow away from us. Some archers do this with a very front-heavy stabiliser set-up, others by actively pushing forward through the hand.
“This all sounds good, but how do we go about actually doing it?” I hear you ask. Not to worry – I’ll explain some methods of setting up your grip now. I would like to mention that while I will go through the entire process, don’t feel that it all applies to you. This is very much something that you can take snippets of and include into your shot. Grip positions and the routines to get into them can be very personal and deeply ingrained. By no means do you need to go back to the drawing board. Just take my advice, analyse what you are doing, and if you identify anything that could be improved on then start work.
There are two distinct positions people often start their shot from. Some people have their bow rested upright on their front foot, while others rest the bow at an angle between their knees. Personally, I prefer the latter as I feel I can more accurately position my fingers and front hand. From the knee will usually involve holding a little tension in your hand to hold the bow up, and this does mean you need to consciously relax later. From the foot gives more easy relaxation in positioning your hand, though it can be trickier to place your hand very precisely at the beginning of the shot. I will explain both.
From the knee
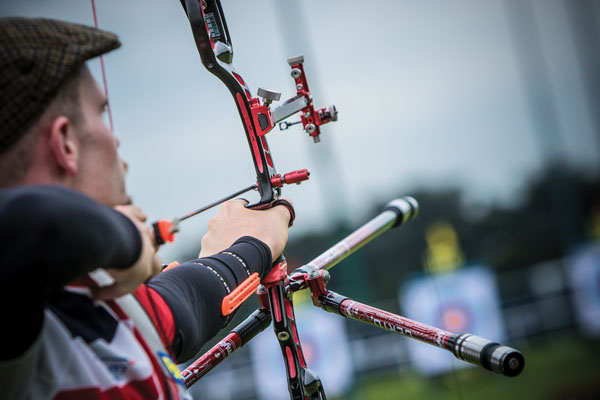
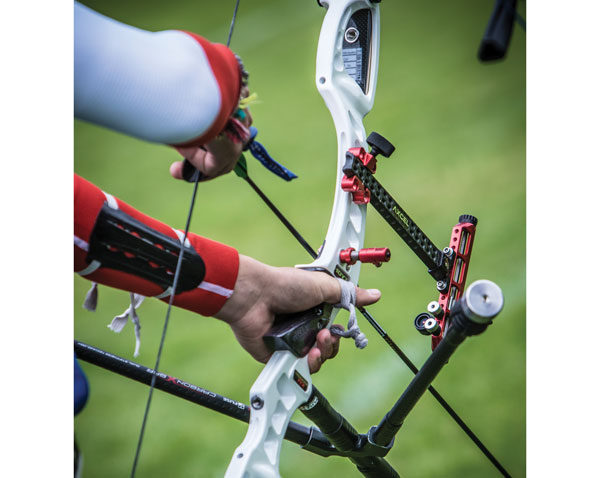
Far from just holding the bow, the front hand plays an active part in the shot
This is the position anyone who has spent any time watching Mr Ellison (USA) will be familiar with. I’ll admit when I was learning the sport around 2010/11 I copied a lot of what that man does.
First, you need to place your fingers on the string to support the weight of the bow. This gives you the dexterity to place your front hand on the bow.
Next, push your hand firmly into the throat of the grip. This will spread the web of your hand wide and make relaxation easier.
Now, to position the hand. I advise having the hard edge on the left side of the grip run down your life line. I fold my hand over this edge to reference that I am in the correct place. This should give you an accurate position both deep in the grip and in the right place. If your grip doesn’t have a hard left edge, try lining the base of your thumb along the right hand edge.
So the hand is positioned and folded over the left side, but we are not yet behind the bow. To achieve this we need to rotate the wrist and move your hand in a slight clockwise direction. Try this with your hand now: have your wrist hanging with the veins pointed inwards, now push the base of your thumb as far away from you as you can. You should see your wrist bones rotate and the hand flatten back towards you. We want to see that on the bow. Your hand should be as flat as you can make it. This creates a force into the bow under the pad of your thumb. We want to keep this force throughout the shot in order to push the bow away from us. Imagine actually pulling your little finger backwards slightly and this will create forward pressure in the thumb pad.
During the shot all forces should stay in the hand. Many people will soften their hand and let the pressure sink to the left hand side, particularly on release.
At this point you will be wondering what your fingers should be doing. I find the easiest method is to have your index finger curled lightly round the front of the bow and your other three fingers rolled up beside your hand. Your index finger can be in contact with the bow, but you don’t want it to be creating any force. The roll on your other fingers means they are less likely to interact with the bow.
We should now have the hand placed deep into the grip with the lifeline along the left edge, leaving the thumb pad mostly in contact with the grip. The back of the hand should be flat and pulled away from the bow, with the force centred on the right hand side of the grip.
During the shot all forces should stay in the hand. This may just be one sentence but is of utmost importance! Many people will soften their hand and let the pressure sink to the left hand side, particularly on release.
These pressures must be greater than the bow pressing back into the hand. When the clicker drops we actively push the bow away from us – this is an active and forceful motion to give direction to the bow. If your index finger is round the front of the bow, imagine snapping that down towards the ground. This should actively push the bow away from you. To begin with, this will feel totally alien, but it is worth many points, trust me. Take a look at our own Naomi Folkard for a lovely front wrist snap.
That’s pretty much it! If you’ve any questions please get in touch with (and like) my Facebook page. Thankfully, much of the foot setup is the same so I won’t double down on detail.
From the foot

Naomi Folkard shoots with a strong wrist ‘snap’ on release
This is the way you will see most Asian archers shooting, notably Olympic champions Ki Bo Bae and Ku Bon Chan (both from Korea) and the beast that is Tan Ya Ting (Chinese Taipei). We start out with the bow further from our arms so the placement needs to be more process based rather than precisely built. That is totally fine and doable, you’ll just need to practice it over and over with review of the position you like, mechanically building your shot.
So the bow is on our foot and the arrow loaded, fingers placed loosely on the string. Now I would advise pushing your hand deep into the grip. A way to test this is trying to reach toward your stabiliser with the tips of your fingers. If you are really far away then you aren’t deep enough.
When you are setting this position up you will need to line up the inside of your forearm with your wrist in the bow. It’s no good just shoving your hand into the grip from an angle outside the bow.
The next part is raising the bow in the draw. Simply lift the bow up to above shoulder height while pressing into your thumb. A powerful method of doing this is to imagine actively pushing the tip of your thumb towards the target – this should keep your hand flat.
Analyse how your front hand is set up and your follow through, and see if anything needs applying. Hopefully it will improve your shooting!
Keeping your fingers soft in this method is a question of never creating tension in them. This way, the hand is set lightly into the grip without any gripping of the bow. This means there has been no activation of the fingers to create tension. Focus on having a loose hand at set up, and then move the pressure through the thumb to keep the fingers soft.
On the click happening, you should still be pushing through the grip with your thumb which will allow your hand to snap forward, pushing the bow away from you. Be careful not to think this is the natural roll of the bow in the finger sling. We are intentionally and actively pushing the bow away from us.
One final tip to go with it: if you are really struggling to push the bow away from you, try adding a weight or two to the longrod, or a longer extender. While I may have just said that they are not the same thing, a more front-heavy bow is easier to push away. Check out Choi Mi Sun (Korea) for an aggressive front hand follow through… it almost looks sore on the back of
the wrist!
There’s quite a lot of depth to read into here, so go through it a couple of times if you need to as there is a lot of information in there. Take some time to process it. Analyse how your front hand is set up and your follow through, and see if anything needs applying. Hopefully it will improve your shooting! Strong execution on the front hand can cut wind drift by up to 50 per cent, so it’s worth looking into.
This article originally appeared in the issue 118 of Bow International magazine. For more great content like this, subscribe today at our secure online storewww.myfavouritemagazines.co.uk