
Breaking blades, torn fletchings, or poor arrow flight can all be symptoms of vane contact with your rest. Duncan Busby explains how to find it, and how to fix it
Make sure your blade width and strength matches your arrow weight
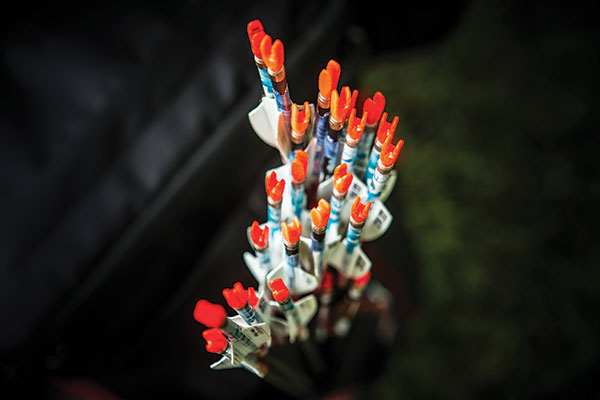
Scuff marks on your vanes or constantly broken blades are signs that your arrows are making contact with your rest. Now we all know that the first stage in tuning your arrows is performing a paper test, because this is the most obvious way to see how your arrows are travelling to the target, but it is still possible to achieve a perfect bullet hole despite persisting arrow contact.
Although vane contact can produce poor arrow flight you can mask this flaw in your setup during preliminary tuning techniques by manipulating your equipment to perform well up close. This creates the impression that your arrow flight is perfect down range too, when in fact your results on the target face are poor. So what can you do when your tuning results are perfect but your scores are still being affected by vane contact? In this article I’ll be looking at the most common causes of vane contact and how you can go about fixing them so you can reap the rewards of a perfectly tuned bow.
Reasons for contact
Firstly, we should explore the reasons for vane contact that specifically relate to issues with your blade and arrows:
The major cause of vane contact is bad nock rotation. Many archers set their nock rotation incorrectly on their arrows or simply fail to set it at all – instead they shoot their arrows straight off the jig without checking for correct clearance, which can cause the vanes to make consistent contact with the rest. When these archers do a paper tune they will adjust the arrow rest, rather than the nock, to get a clean bullet hole. This will give them an incorrect but repeatable tune provided the nocks are set the same and the vane contact is consistent. Most usually in this case the rest is set so the arrow is sitting nock low (below 90 degrees to the string) meaning, when it’s fired, the back of the arrow hits the blade which in turn adjusts its trajectory so it flies straight when it passes through the paper. If the archer were to walk back a few yards and repeat the test they would probably find that the arrow would start to tear nock high, confirming that it’s bouncing off the rest.
The major cause of blade contact is bad nock rotation, so check this first
To check your nock rotation is set correctly, nock an arrow on to your string and sit it on the rest. Now look down the back of the arrow at the position of your vanes. If the two bottom vanes do not look like they will clear the blade, then rotate the nock slightly until they are both sitting either side of the blade. If you are finding it difficult to see whether your vanes are making contact then spray the back of your arrow with a powder spray; you can use antiperspirant if you don’t want to buy a specific product designed for this. Upon release, the powder will be removed from any impact points, allowing you to adjust the position of your nocks accordingly.
An overly weak arrow spine can cause contact with your rest, as the arrow flexes excessively on release the back end can contact the blade as it passes over it. Conversely, this contact can sometimes knock the arrow back on course resulting in a bullet hole through paper and, as the rest settings are usually correct, with the arrow sitting at 90 degrees to the string and sitting through the centre of the bow, it can be difficult to spot the cause of the contact. But you will find that your arrow groups on the target will usually be sporadic, despite achieving a perfect bullet hole through paper.
You should ensure that your arrows are the correct spine for your bow using the manufacturers’ selection charts or a spine selection program. As a rule, you should find that weak arrows tend to group better at longer distances but produce poor results closer up (this is usually observed at the target as a good central group with one or two ‘flyers’ around the outside), whereas stiff arrows will group better at closer distances but poorly further away, with fewer arrows outside of the group but a more open pattern. Although, if you are getting arrow contact these patterns may be difficult to observe, so unfortunately you may need to diagnose any problems with contact before you adjust your arrow spine.
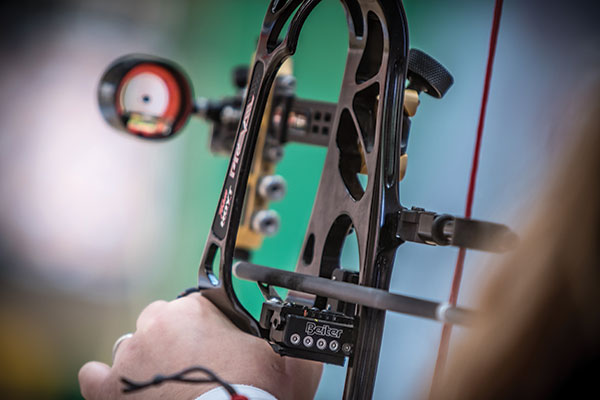
Using an incorrect blade width can also cause vane contact; if the blade is too wide the vanes will make contact with the tips of the launcher. This too can be corrected to produce a bullet hole through paper, but again this rest position will most likely be incorrect and will cause bad arrow flight down-range.
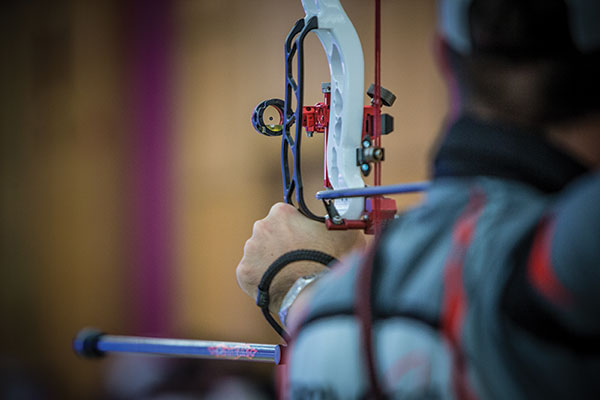
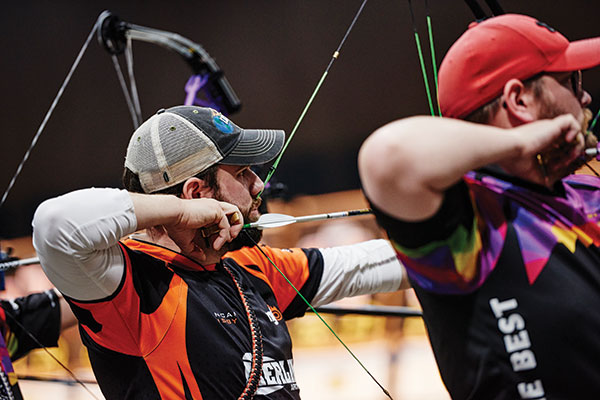
Torque in your bow hand can lead to vane-rest contact issues as it can cause the arrow to sit at an angle on the blade
A blade that is too weak to support the weight of the arrow can also cause contact with the vanes; the blade can flex too much when the arrow passes over it and then spring back up as the rear of the arrow leaves the bow, causing it to make contact. In contrast, a blade which is too stiff for your arrows may not flex enough to allow the rear of the arrow to successfully clear it. Both of these issues can give fairly consistent paper test results, but will often give poor arrow groupings on the target.
It’s important that your blade is the correct width and stiffness for your arrows. To confirm that the blade you are using is the correct width for your setup, nock an arrow and look down the back of the shaft. Check that both the bottom two vanes have sufficient clearance either side of the blade. If your nock rotation is correct but it still looks unlikely that both vanes will clear the blade on release, then consider switching to a narrower blade. Most blade manufacturers will make recommendations on which products you should use based on the size and weight of your arrows, so it’s a good idea to weigh your finished arrow and make note of the shaft you’re using. Unless you are using extremely heavy or light arrows a 0.010 blade will usually work best, and always try to use the narrowest blade possible to avoid clearance issues. Again, if you are struggling to work out which part of your arrow is making contact with your rest, do a powder test before making any adjustments.
Finally, an incorrect blade angle should be considered as a potential cause of contact; if the blade is set at too shallow an angle the back end of the arrow can make contact, which will result in a nock-high tear on paper. Conversely, if the blade angle is too steep then the arrow may sit deeper between the prongs, increasing the likelihood of contact with one or both of the bottom two vanes which will again affect your paper test results.
To avoid both of these issues I would recommend that you set a 38 to 40 degree angle to optimise your blade performance and to minimise contact.
Your blade angle can also present contact problems; between 38 to 40 degrees is a good place to start
Equipment and Form
Now we should consider how your equipment and form can affect vane contact, beginning with your bow.
As some bows do not produce straight arrow flight, poor nock travel can cause your arrows to be driven into the blade as they leave the bow. This is usually a fault of cam design and as a result can be difficult to tune out, although it isn’t a common problem nowadays. A consistent paper tear can be achieved but often with obvious contact as poor nock travel is usually best fixed by adopting a nock high setting on the arrow rest. You should accept a high tear through the paper and concentrate on your arrow grouping instead. However, it is important to ensure that your cams are correctly timed and both stops hit the cables at the same time, as timing issues on even the best cam system can cause nock travel issues.
Excessive torque created by a poor grip can cause the arrow to sit at an angle on the blade, so when the arrow passes over the blade it rides over one side of the prongs more than the other. This is likely to cause contact with the vanes and will result in excessive scuffing down the side of the blade. Contact can be reduced slightly by adjusting the position of the blade so that it sits straight to the arrow at full draw, and you can usually still achieve a bullet hole after this adjustment. However, it is always advisable to try to correct any grip problems by consulting a reputable coach first.
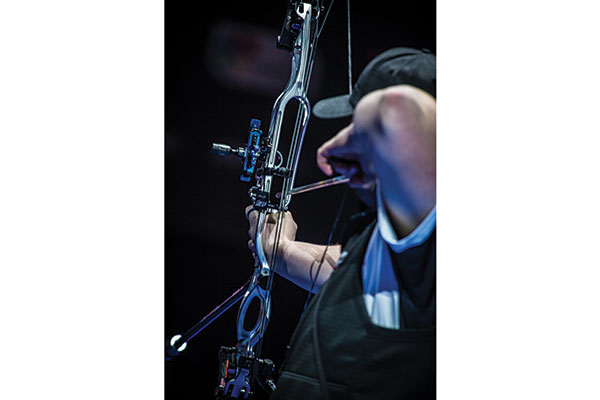
Finally, you can still have vane contact despite achieving a perfect paper tune because of issues created by your release aid. An arrow shot with a release aid is more likely to flex vertically rather than horizontally in contrast to the archer’s paradox often seen with a finger release. Because of this, the rear of the arrow can sometimes flex downward as it passes over the rest, causing contact. This is often because the jaw of the release is above the arrow at full draw and the initial force on the arrow pushes the back end down. Again, this can create a bullet hole through paper but will likely open up to a larger tear as you move further away.
To resolve this issue you need to set your nock point and D-loop so that the jaw of the release aid is directly behind the arrow at full draw. This is usually achieved by using a single nock point below the arrow or, if you prefer to add another one above, make sure the lower one is significantly larger than the top.
Your release aid can also be a source of contact problems if it sits above 90 degrees to the arrow
Vane contact is not always seen as an issue; some archers can assume that if the contact they’re experiencing is light and consistent and there’s no obvious effect on their results then it’s not a problem, particularly if their tuning results are positive as well. But you can find that this initial imperfect tune can put increased pressure on your set-up and how well it performs; unfavourable shooting conditions as well as changes to the tune of your equipment can create further challenges to what is already a finely balanced set-up.
So if you are breaking blades or finding scuff marks on your arrows make sure you tune your equipment correctly. Most archers who suffer with false/positive paper test results make the mistake of doing a paper test only once at a fairly close distance, whereas if you walk back a few yards and repeat the test you are more likely to be able to see and then diagnose any problems with the tune of your equipment; I would recommend re-testing every two to three yards all the way back to 20 yards, and you should always consider a paper test to be only the first part of tuning your equipment, before moving on to bare shaft testing and group tuning. It’s important to remember that a textbook setup isn’t always correct, so don’t forget to think outside the box when working through any tuning issues and contact needn’t impact your arrows or your score anymore.
This article originally appeared in the issue 122 of Bow International magazine. For more great content like this, subscribe today at our secure online store: www.myfavouritemagazines.co.uk