
In the second part of his series on arrow-building, Adrian Tippins looks at getting good bonds when it comes to inserting points and pins. Click for the first installment of our How to Build an Arrow series: How to prepare your shaft.
Welcome to the second instalment of this “how to” guide, where we are looking at the process of practical arrow building broken down into its component parts. In this issue we’re going to be taking a look at fitting hardware to the shafts that we explained how to prepare in the previous issue. Fitting hardware to shafts isn’t all that difficult, but it’s worth employing a good amount of concentration and good technique to ensure a clean, efficient, accurate and, most of all, a safe job. When it comes to fitting points into shafts we really only have three ways of fixing them. Firstly, we can glue them in with hotmelt; secondly, we can glue them in with a specialist impact-resistant adhesive such as Bohning Insert Iron; or thirdly, we can use the two previously mentioned adhesives to glue in an insert into the shaft that will accept a screw-in point into a threaded aperture.
The most common type of points used in modern day arrows are what we call ‘break off’ points. This is where the point comes in three sections. The two rear sections each weigh 10 grains and can be broken away from the main shank to reduce the point weight to set it at a specific level for the archer. The easiest and safest way to break points down is to use a pair of decent nock point pliers as the curved apertures in the pliers mirror the curves of the points very well. You should be able to do this just by holding the point in one hand and the pliers in the other. If this proves too difficult you can use a vice or some other secure method of holding the point so you can apply more pressure and leverage. Once the point has been broken down to the desired weight, any burrs or tangs should be removed with a file – these will make weight matching more difficult if left.

There are several glue options available
when it comes to fixing points in
If you are totally sure of the point weight you require and want the most accuracy in terms of weight, use a glue like Bohning Insert Iron. All you have to do is put a small ring of glue around the base of the point or insert and fit it into the shaft, turning as you go to ensure even coverage. Be sure to wipe off any excess as this type of adhesive swells up like expanding foam after 10 hours. It has a long cure time of 48 hours, but it’s the strongest method of fixing a point and it can be precisely applied if you are weight matching the arrows. This type of adhesive is especially good for full carbon and AC arrows that don’t like high amounts of heat.
Alternatively, the most common way of fixings hardware into shafts is with a hotmelt glue. This glue comes in a solid stick that melts on contact with a hot surface. The best tip I can give you when fixing points using this method is to use a vice if you have one at your work station. It will free up your hands and lower the risk of you burning yourself or something else. If you don’t have a vice, hold the point with pliers at the actual point end of the shank. Gently heat the point over a burner or with a blow torch. When hot enough, lightly run a glue stick over the rear half of the point shank.
Once evenly coated, feed the shafts over the top of the point, twisting as you go to ensure even coverage. This will also spiral the glue fibres, making for stronger adhesion. Push the shaft all the way down to where the point is being held by the pliers. Keeping hold of the shaft, release the pliers and push the point down on a firm surface to fully seat the point into the shaft. If the point cools too rapidly and the point hangs up before it’s all the way into the shaft, just apply a little more heat to it to re-melt the glue, which should allow it to fully mate with the shaft. Leave the shafts to cool for around five minutes in a rack where they will be kept separated. Once cool, any excess glue should easily peel away from the seam between shaft and point.
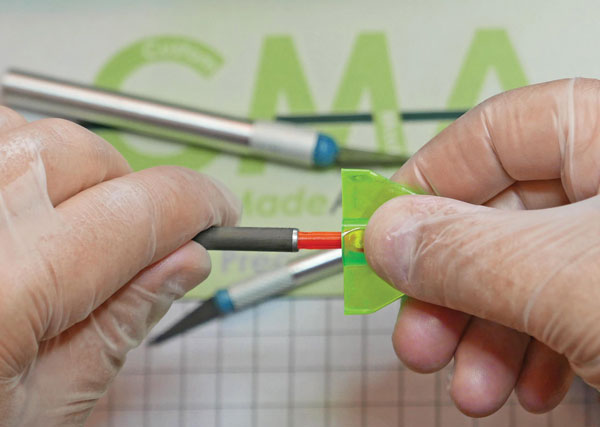
Nock insert tools let you fit the nock without damaging the plastic
This method is very quick and there is little to no curing time, meaning the arrows can be shot quickly afterwards. It is also very easy to remove the points if needed by reheating the shaft and extracting the point with pliers. The downside is that it’s difficult to meter out and control the amount of hotmelt accurately. This can have an adverse effect on weight matching, and ultimately this isn’t as strong as the first method described. Pin nock adapters and inserts are inserted into the rear of the arrow in the same way. It’s always advisable to insert pin nock adapters with a hotmelt-type glue as there is a much higher probability that these will need to be extracted. Hotmelt glue can be purchased with different melting points – some very low temperature glues can melt if the arrows are stood for a few minutes in boiling water. Low temperature glues are excellent on full carbon and AC arrows where the use of direct heat could result in damage the shaft.
Fitting a nock to the shaft is a relatively simple process as nocks normally just press on, or into the shaft. On budget arrows you may find that they are glued directly onto a taper swaged end. The key point to remember when fitting nocks is to always use the correct nock insertion tool. Nocks can often need considerable pressure to force them down and into the shaft, and this is especially true of shafts employing a uni-bush. The correct insertion tool will securely cosset the nock and the wing nut style ergonomics will allow you easily and safely to push down while turning.
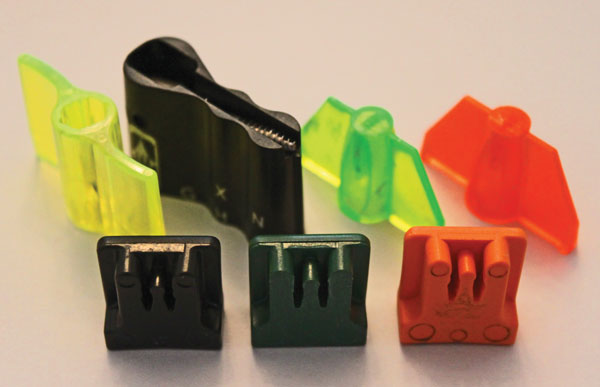
There are nock insert tools available for almost all varieties of nock
Once the nock is fully seated inside the shaft, use the nock tool to rotate it to your desired indexing position. Never use pliers to grip the nock when inserting or rotating. Nocks are made of soft plastic and are easily damaged by the teeth of pliers biting into them. A damaged jagged nock could cause harm to your bowstring. Never attempt to insert a nock by partially inserting it and the pressing the shaft and nock down on a hard surface to force it the rest of the way. This will almost certainly result in damage as the ears of the nock can buckle under the pressure.
Easton has three different nock tools, which are colour coded as follows: green for G-nocks, orange for Super and 3D nocks, and there’s also a more expensive black universal tool with integrated extractor. Beiter also has three colour coded devices, which are called Push-Pull tools. The black tool is for small groove asymmetric, the orange for large groove asymmetric, and green for the Hunter fitting nocks. Bohning also has its own universal model. Finally, a tip for dealing with very stubborn, tight-fitting nocks. Try giving the shanks a thin smear of arrow lube or general workshop oil and grip the arrow with an arrow puller. These two things combined usually do the trick. Next time we’ll be turning our attention to arrow wrap formatting and installation.
Step by Step: Inserting a Point
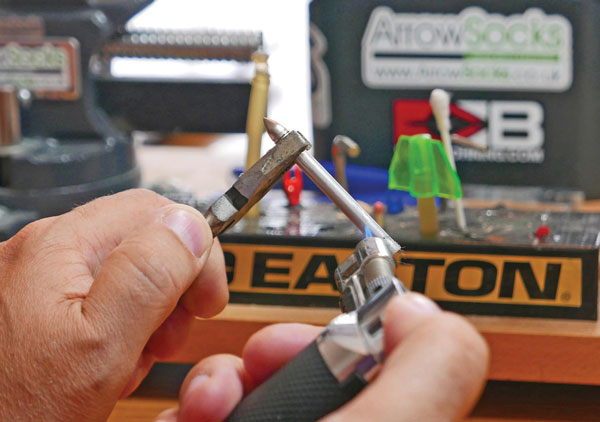
Step 1: For inserting points with a hotmelt glue, first hold the point steady and heat with a blowtorch…
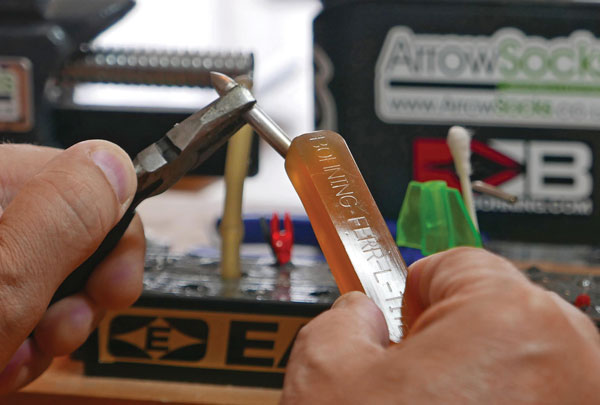
Step 2: Apply the hotmelt to the shank of the point…
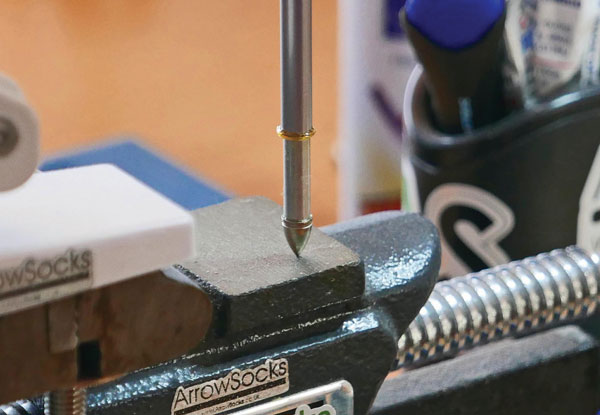
Step 3: Then press the arrow shaft down over the point.
Find Part 3 of Adrian Tippins’ series here
This article originally appeared in the issue 117 of Bow International magazine. For more great content like this, subscribe today at our secure online store www.myfavouritemagazines.co.uk