
Course setter Rob Jones takes us through how he makes a course both challenging and interesting
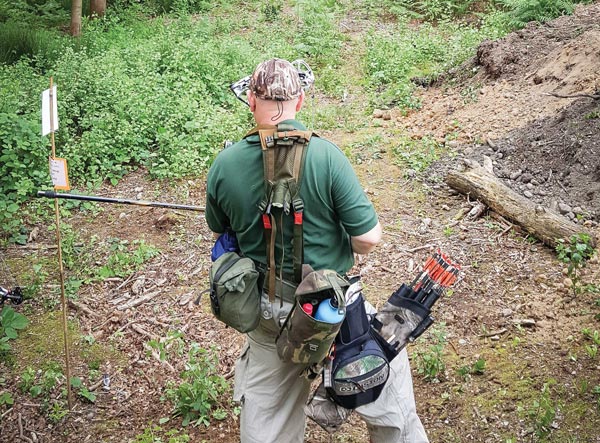
this standing stag was set partly over open ground, but saw more misses than we expected
Some of you may have read Alex Tyler’s article in issue 118 on the National Field Archery Society’s 3D championships in Derbyshire. Here I’m going to detail what was involved when the Organised Chaos Team set one of the courses in 2017.
The event saw over 600 archers spread over three courses, each of 40 3D targets, ranging in size from Group 4 (Small Poison Frog) to Group 1 (Standing Elk), all set at unmarked distances. Archers would shoot two different courses: one Saturday and one Sunday. Saturday would consist of Hunting Tackle class (bare bow with no sights shooting wooden arrows and feather fletchings), Compound Limited and Compound Unlimited, followed on Sunday by those shooting American Flat Bow, Barebow and Crossbow. This meant we would have a mix of sighted and traditional archers and we’d have to factor this into the shots to ensure all found them challenging, but still hittable.
Chaos Rules
We set ourselves a few simple rules:
Safety was paramount, as an arrow can easily glance off 3D targets. We had to ensure safety at all times – meaning, we dropped some shots that looked great but didn’t work with other shots.
Looking at the course as a whole and not just a collection of individual shots is vital.
It was very important that each shot looked good, and natural (more on this later).
Use the terrain and perspective to make shots challenging not just using distance i.e. pushing shots back as far as allowable.
The course had to be technically challenging, providing archers with framed shots between trees etc. whilst still being hittable by a low poundage bow as we were setting a course for mixed disciplines.
All walk offs (exit routes) from targets were to be 90 degrees from the targets, so at no point would anyone have a walk off behind the 3D to the next target.
No shots were set towards paths or tracks.
Using the available tree canopy can offer great opportunities too for course layers, as shooting into the dark makes a shot more challenging for sighted archers
First steps
Mapping the ground was vital so we could sort the course route, target locations, pathways, along with directions of shots and possible overshoots. It provides you with guidance on how the shots interact with one another or other terrain elements like footpaths, site boundary, water courses etc. Not until you accurately plot these can you be certain overshoots are safe.
You need to become familiar with the territory, as knowing the ground allows you to adapt. As a team we walked the entire site to familiarise ourselves, making several trips in the preceding months scouting the woodland, working out potential routes and paths. We returned with a wealth of ideas and photos of possible shots, always considering which 3D target would look the best, along with GPS coordinates of shots.
Setting shots to challenge and look good
We would end up camping for 10 days and taking a week to set out all of the targets and clear the paths prior to the event. We set two loops, each of 20 targets, with a crossover point at the catering stop, allowing archers the opportunity to grab some food and a break.
When setting targets we’d try to avoid adjacent targets being the same distance or type; better to mix up the distances, especially for sighted archers to force them to adjust their sights. Likewise, you want to mix up the size and type of 3Ds, avoiding a 3D deer followed by another deer of the same size and distance.
Setting the targets so they look natural also adds to the enjoyment. When we discovered we had a 3D crocodile, we set it near a water course so it looked like it had just climbed out of the stream. This target would catch many archers out as it was a low shot from a sloping hillside.
Using the available tree canopy can offer great opportunities too for course layers, as shooting into the dark makes a shot more challenging for sighted archers, if you then position a low dark target it makes it even harder to judge. So setting a bedded black panther 3D in the shade of the tree whilst the archers were out in the open seemed logical.
Using the terrain and woodland to frame the shots is also good technique; the NFAS allow shots to be framed between trees or undergrowth – i.e. you don’t have to have clear shooting lines.
We deliberately set four targets that we hoped would confuse people. The first (a 3D deer) was slightly uphill through a series of gaps between trees which framed the shot
Fooling the eye
Large 3D targets offer you a variety of opportunities to fool archers, as archers often expect them to be set at the maximum distance allowed by their size. Add in some careful positioning and restricting the archers approach or view of a target, and you can fool people. We set a standing caribou so it looked like it was moving to feed off low leaves on a tree from the shooting peg.
Only when you approached to retrieve your arrows did you discover the optical illusion as it was actually several feet further back. This seemed to be one of the shots the competitors enjoyed the most, whether they hit it or not – with some commenting how they’d like to go back and shoot it again.
The championship is open to all ages and it was very important for us to remember this when setting shots. We worked backwards from the target once we agreed the line of the shot, and target location, then work back setting the junior pegs, which have to be closest. This made us consider each peg carefully to set a challenging shot for all ages.
One shot that surprised us was a standing stag, set over partly open ground with just a little intervening scrub and bushes. I watched numerous archers miss this from their first peg, normally misjudging the distance by three to five yards.
Confusing the crowd
We deliberately set four targets that we hoped would confuse people. The first (a 3D deer) was slightly uphill through a series of gaps between trees which framed the shot. Due to the angle of the trees it became quite difficult to judge the distance as one tree merged into the foliage of another.
The next shot was a large 3D bear set to look like it was coming down the slope over a slight mound covered in bracken and then across open ground. We’d chosen this target because it’s normally seen leaning vertically against a tree. Setting it on all fours, we hoped would confuse archers – which it did.
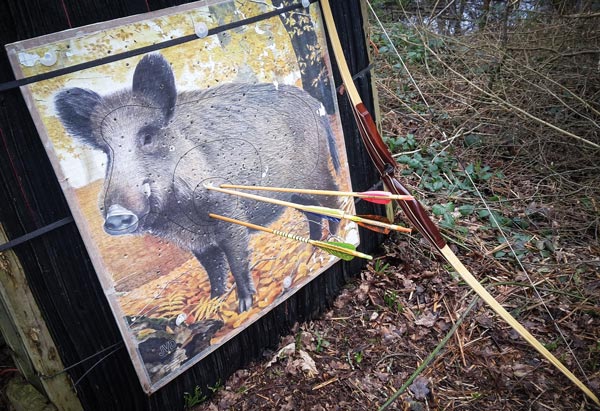
The third target caught a lot of sighted archers out as it was a small tree frog target (Group 4), being set at just three and a half yards, practically vertically straight down an earth bank. The short frog shot seemed to be a serious challenge for those using sights as few ever shoot a target at that incline or distance.
The last of the four targets was another large 3D deer, this time framed over the bracken undergrowth and under canopy. Of the four shots, three were set at 31 yards but designed to look completely different. Speaking to archers afterwards this appears to have worked, as few of them realised that the targets were the same distance.

You can always expect to lose a few arrows on a field shoot
Feedback on the day
Having set the course, what we all found interesting was seeing which of the targets were proving to be the most challenging, along with which were the ones the archers liked or disliked the most.
As competitors left at the end of the day, many of them stopped to thanks us for setting the course. I recall one crossbow archer smiling and saying how we’d manage him to catch him out on three targets, and another who, after five targets in, was second guessing himself on every shot. More importantly, many of the juniors, the next generation of archers in our sport, enjoyed it too. It’s vital for the future of the sport that we capture the imagination of these young archers, and so a special thanks to all of the Organised Chaos team for helping set the scene for the youngsters involved.
This article originally appeared in the issue 123 of Bow International magazine. For more great content like this, subscribe today at our secure online store www.myfavouritemagazines.co.uk
We are setting up a 3-D archery course to be used primarily by guests staying at the ranch and yet open to the public and potentially a competition course. Help with targets, setting up the course and sharing the course if competition course is needed in northeastern Washington State.