
The first few weeks with a new bow can be full of things to remember. Andrew Smith recommends keeping things simple, and prioritising form over fiddly tuning
In the early days, the most important thing to be confident in is that your bow is set up correctly and your arrows are matched to you and your bow
There is nothing better than shooting with your own equipment; the transition from club gear to your own bow is always a revelation. Yet at the same time there can be some anxiety – have I bought the right items? Is it set up OK? And can I remember how to put it all together?
Archers buying new equipment will usually fall into one of two camps, those that bought from a shop and those that bought second hand or online. For the first group things are simple; if the shop has done their job properly you will have the right equipment, it will be set up correctly and the arrows, bow length and draw weight will be matched to you. All you will need to do is assemble it correctly, remembering to fit the limbs and string on the right way around, and then go and shoot.
For the second group, there will probably be some set-up required, so it might be an hour or so before you get shooting. In these cases, archers either set the bow up themselves based on information from the internet, books and magazines, or they can draw on the expertise in their club. In this article, we will explore how you can get off to the best start and look at ways of measuring your progress. The first thing to remember is that archery is an individual sport and your ambitions and what you want from the sport are unique to you. There is nothing wrong in just using archery as stress relief from day to day life, wanting to be the next Olympic champion or anywhere in between.
Archery is a very simple sport – we load an arrow, pull the string back and let go of it, sending the arrow to the target. We repeat the process and try and get it to hit as close to the first arrow as possible, ideally in the highest scoring area of the target, and so on for the rest of your archery life.
The problem is that we are not that well designed to do this as repeating a process the same over and over is hard – probably why we developed robots for manufacturing. Over many years, we have stumbled across various different ways of approaching this and learnt the best ways to shoot a bow, and I say ways because not all coaches agree on the best approach and over time as we learn more about how bows, arrows and our bodies work, ideas change. In all cases though, the system you use should be simple, easily repeatable, not unduly fatiguing, that doesn’t interfere with other archers on the line and works in all weathers.
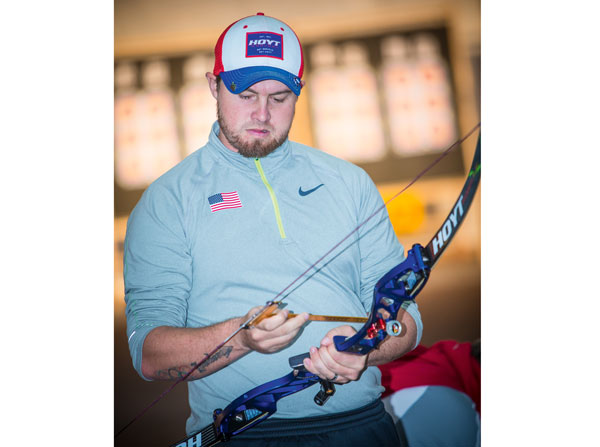
In the early days with your first bow, you’ll make faster progress by shooting rather than tuning
There are two aspects to archery: what the archer is doing and what the bow is doing. These days especially, in the early months far too much attention is paid to what the bow is doing. The truth is that even a poorly set-up bow will put arrows where they are aimed. However, our shooting form is part of the aiming process, so where we think we are aiming and where the arrow is aimed are not always the same.
If this is the case, why do we see many archers spending lots of time bow tuning? For many it is a belief that if the bow is set up perfectly then any issues will be archery form. The problem with this approach is that bow tuning is a cause and effect process, change something, shoot some arrows and look at the results and adjust accordingly – therefore you can only tune the bow to your ability.
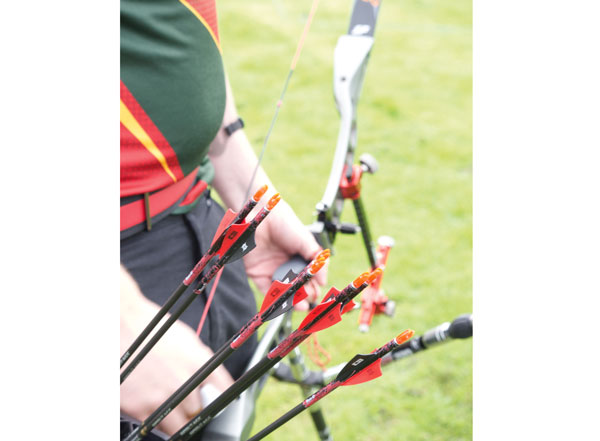
In the early days, the most important thing to be confident in is that your bow is set up correctly and your arrows are matched to you and your bow. I cannot stress enough – and you will begin to appreciate this as you progress – just how important your arrow spine (bendiness of the arrow to clear the bow and fly straight to the target) selection is to your accuracy and progress.
This article is not about bow set up, so assuming that has been completed it’s all you will need to do at this stage and for many months, if not years, to come. So, first off and for the first few months, what should you be concentrating on?
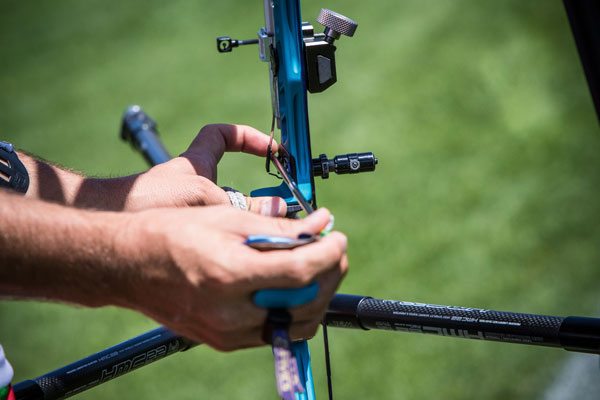
Putting your bow together
After buying your bow and before you go to the club, practice putting your bow together, especially stringing it. This will make you more relaxed when doing it in front of all your club mates.
Get used to putting your bow together correctly (and checking all the measurements) so you can be confident every time you shoot it
Shot routine
Your shot routine is all about consistency, doing the same actions each time. I always suggest that archers write this down and consciously work through it in their head during each shot, as it is important to include all the processes. Over time most of your shot routine will be locked into your sub-consciousness and you might require just one or two reminders. Your shot routine is all that you have been taught by your club coach and starts by the positioning of the feet, standing tall, loading the arrow, setting the fingers and so on, all the way through to releasing the arrow and the follow through. Initially, it will be a long list. In the early days, these actions will feel clunky and unnatural, but you are teaching your brain what to do, a bit like learning to drive.
There are a few procedures in your shot routine that are easy to miss off the list, and the first is your feet position and where you stand on the line. Any deviation to either each time you go up to the shooting line means your body will be aiming in a different direction to the last end. To help you should use foot markers – tape indoors and pins outdoors (even just target pins) will do.
We should stand tall, not upright with our chests out, but certainly not slouching or with our bums or stomachs sticking out.
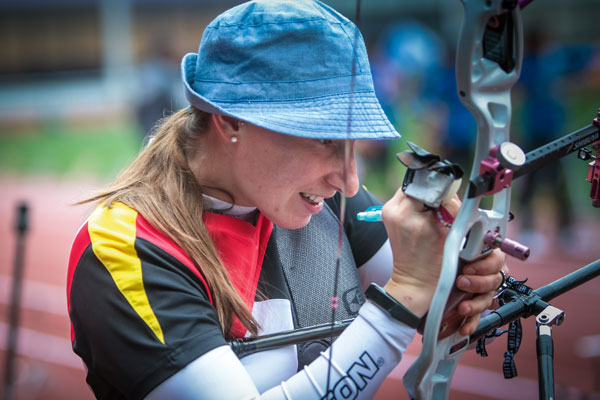
Everything we do with the draw hand and how we anchor is the equivalent to the back sight on a rifle, so it’s important to position the hand and the string on the face in the same place each time. This will help with your head position and you will then start to notice the position of your string in relation to your riser. The important thing is that the position of the string (known as the string picture) is the same each time, otherwise your arrows will go off to the right or left.
At the longer distances where you need more bow elevation, this is achieved by maintaining the same T position at full draw you use at 18m and bending at the waist. If you just raise your bow arm you will shorten your draw length and everything – arms, shoulders and back muscles – will end up out of line for a clean shot.
Finally, aiming. In recurve archery we want the sight pin to be hovering over the gold. It is impossible to keep it dead still and if you try, you will forget all about your shooting form and you will not execute a strong shot. I suggest that you stare at and focus on the gold; your sight pin will be out of focus but still visible to allow you to have it hovering over the gold.
Some clubs insist that beginners score over 252 at one distance before progressing to a longer one, which can help provide some structure and stop archers spending most of a shooting session looking for arrows
Sightmarks
Spend time learning how to adjust your sight. I don’t just mean the mechanics, but also how much adjustment is required to move an arrow across the target. Remember, the scale found on sights does not relate to any distances, it is there to help you record your sightmarks. When getting your sightmarks, start close to the target and work your way out otherwise you’ll spend most of your time looking for your arrows.
Because your groups at this stage will be quite big, try and envisage the centre of a group, as this will make things easier and you won’t be moving your sight for every arrow.
Buy a small notebook. Initially, this will allow you to record your sightmarks and comment on a day’s shooting, but it can also serve as a reminder of your shot routine, record your scores, weather conditions and how you are feeling. In the future if you visit other clubs or attend open competitions you will find that the sightmarks there may be a little different to those at your club – not by much, but most shooting fields are not flat and level.
For your first time out, especially outdoors, start at 18m and get a confident sightmark, then if there’s time move to 30m and so on. However, don’t feel like you have to get a complete set of sightmarks first time around. You’ll notice most sights come with a longer extension bar than the one you might have had on your beginner bow. Basically, the further out the bar is from the bow the better, though as you take on the longer distances your sight pin will drop lower. If it gets too low it will get in the way of the arrow flight, and when this happens just bring the extension bar back towards the bow, allowing you to raise the sight pin for a given distance. Getting sightmarks is all about trial and error. When you establish a sightmark for a distance don’t forget to write it down and include both the position on the vertical bar and how far in or out the extension bar is.
Measuring progress
While it is fun just shooting arrows, most archers want to become more accurate, and obviously the more you work at your shooting form and receive quality coaching the better you will get. But don’t forget, this is a scoring sport and awards are won and lost based on the score you post. So, scores are a tangible way of monitoring progress.
There are also several awards run by governing bodies and clubs to help you monitor your progress. There’s no need to rush into attempting these, but it is confidence building to work your way up the levels, and a badge or two to put on your quiver along the way always looks good.
Handicaps and Classifications: These are the most popular schemes run in the UK and archers will define themselves by their classification – there is not space here to explain, but basically you shoot a minimum of three recognised rounds at your club on club target days and the scores determine your handicap and classification. Your club records officer will be able to give you a detailed explanation. Other countries have similar schemes.
In the UK, another popular unofficial scheme is the 252 award, which is based on shooting 36 arrows at a single distance. Simply score over 252 and you get a badge for that distance. Some clubs insist that beginners score over 252 at one distance before progressing to a longer one, which can help provide some structure and stop archers spending most of a shooting session looking for arrows.
Final thoughts
So, providing you have bought equipment that is suited to you and it is set up correctly your archery will get off to a flying start.
Remember, a bow is a mechanical device and, breakages aside, it will consistently put arrows in the same place day after day when the basic setup is in the right ball park. Unfortunately, regardless as to how finely tuned our bows are, we can’t always do the same and our performances will differ from day to day. This applies from beginners to the top internationals. So, when we are not scoring well it is most likely to be an issue with our form not the bow. It is always worth a quick check just to make sure nothing has gone wrong on the bow, but chances are it will be the archer. The important thing is not to get stressed out and worried about what’s happening or what others might think, just stay calm and trust in your shot routine. Hours spent practicing shooting pays dividends, hours with tools in your hand – especially in the early days – and fiddling just lead to frustration. Remember, you can only tune a bow as well as you can shoot on the day. Later, when you become more consistent from shot to shot, you might be able to make adjustments that will improve the forgiveness of the bow to your shooting style, but for now it is most likely a waste of time.
This article originally appeared in the issue 113 of Bow International magazine. For more great content like this, subscribe today at our secure online store www.myfavouritemagazines.co.uk