
In a precision sport, it’s a matter of millimetres between winning and losing. John Dudley outlines the small things that make a big difference
In a precision spot, the small things can add up to make a big difference
To start this article off I want you to try a little exercise for me. I want you to take your thumb and index finger and see how close you can hold them together without letting them touch. Depending on how shaky you are will decide just how close you can get them to be. Once you have them as close as you possibly can, I want you to hold it there and just look at that thin little bit of daylight between your fingers. This tiny little space represents several things in relation to archery. The reality is that space has decided many of the Olympic medals, many of the World Champions, and many of the personal bests shot in archery. This little space will be the difference between you winning and losing, you shooting the best groups of your life or the worst. I learned many years ago that the small things are always what add up to matter most. Today I want to share with you several small things that will add up to either big gains or big losses in your archery game.
A Perfect Eclipse
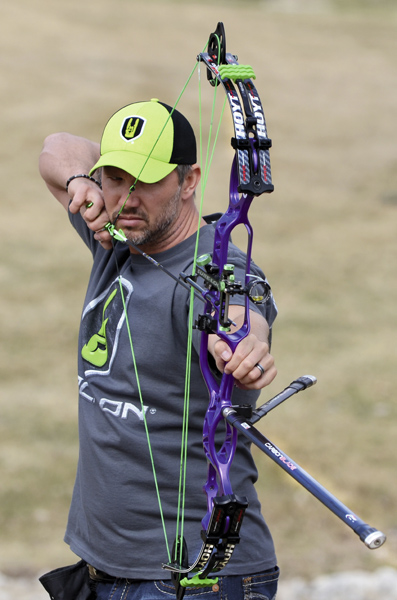
One of the first areas of importance is in your peep sight alignment. I have been fortunate to have had success in almost all formats of archery, including field shooting. One thing I learned in field is just how important the peep/front sight alignment is. Your pin must be perfectly centered in your peep each and every shot or your groups will never be consistent. When you shoot on difficult angles in field archery it becomes tougher to perfectly centre your pin in the peep and this small error adds up to big points lost for the people who aren’t paying attention to it. I noticed this most in field because it was easier to happen, although this is something that you need to be aware of all the time, regardless of what you are shooting at. Once again, it doesn’t take much. Think of your peep as a sight. If you move it up or down a few millimetres it is not any different than putting six or seven clicks on your front sight – it will change where you group. The same goes for your left to right alignment. If you are out of alignment (left or right) by the size of a few sheets of paper then you will be out of the gold. It’s that simple! Any mis-alignment is no different to clicking your sight one way or another. You wouldn’t want to do that each shot as you are standing in a set location.
John aims to create a perfect eclipse effect with his peep sight and scope lens
I get asked a lot what size peep sight I use, as well as what scope I use. First off I use a Sure Loc Black Eagle 29mm scope. I like this smaller size because it allows me to use a smaller peep to make a perfect eclipse with my front scope and peep sight as I look through them. I pick a peep that perfectly matches this scope housing, and since I use a 29mm for most target shooting I also use a smaller peep, which reduces the chance for mis-alignment. The larger the peep, the larger the chance for error! Having a perfect eclipse will dramatically help you reduce the left to right and up to down variance between your peep and front scope. Many archers also try to make a coloured edge around their scopes just so that they have an extra reference for perfect alignment. This may not seem like much, but if you can look at the size of the lines on your sight scale you can see that there isn’t much difference between a 59- and 60-metre mark. If you have that same small variance in your peep alignment each shot then it is no different than moving your front sight a few turns one way or another each and every shot.
Inconsistent peep alignment has the same effect as clicking your sight a few turns each arrow
Nock a Problem
I just talked about how big of a deal it is for your peep alignment to vary just a sliver up and down. Well, the same is true for your arrow nocks. I often see people who don’t make adjustments to their nock points and loop systems for different types of arrows or arrows that have different nocks. For example, an Easton Super nock is not the same thickness as an Easton Pin nock. A Beiter Hunter nock for your indoor arrows isn’t the same thickness as a Beiter X10 Hunter nock. If you don’t monitor your nock fit and nock point fit then you are surely costing yourself countless numbers of points. A simple fact is that you can’t have any up and down play in your nock fit, otherwise it is no different to having an arrow rest that moved slightly up or down each shot. When it comes to nock fit, you need to have zero play with your arrow nock between your nock points or loop when your bow is at full draw.
How much string pinch you get as you draw your bow back will determine whether or not you need just a minor amount of play when your bow is at rest. This will depend on your draw length, the bow’s axle-to-axle length, and brace height, which all influence the string angle of the bow. For example, I have a long draw length of 31”. When I draw my bow back the string angle does pinch down a little bit on the arrow nock, especially compared to someone with a 28” draw. Because of this I have to keep about half a millimetre of space between my lower nock point and the bottom of my arrow nock. However, at full draw this spacing is gone because of the string angle and I have perfect support without having too much pinch. Nock fit can also be too tight, which then causes the arrow to lift slightly on the arrow rest at full draw. That can also cause problems in grouping. Too much nock pinch can be a common problem and gives people poor results. I like to draw my bow back with an arrow that doesn’t have a point in it just to see if the arrow lifts off the launcher blade. If it does then I know the nocks are too tight and it is causing problems. The bottom line is you want no spacing in your nock points when at full draw, and also want an arrow that doesn’t lift off the launcher when you draw it back without the weight of the point. If you eliminate these small things then you are sure to get big results.
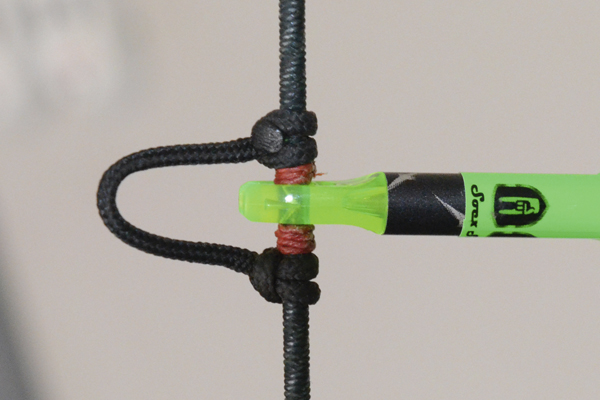
Proper nock fit is essential. Different nocks are different sizes so make sure you account for this if you’re changing them
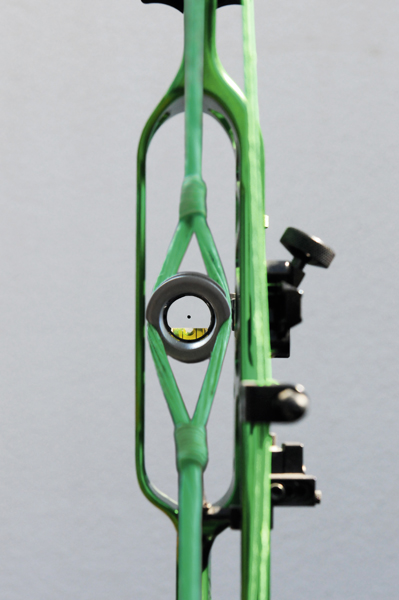
Level Up
Another tiny item that can cause a big miss when it matters most is your sight level. This little device carries such an importance. In field archery the people who aren’t paying attention to their sight bubble show up really fast. Points will drop like flies if you aren’t keeping that bubble dead in the centre of the lines.
However, if you spend some time learning your bubble then you can use it to your advantage. As a rule of thumb your arrow will normally follow the direction that your top limb is leaning. If your top limb is leaning to the right (bubble would be to the left of centre) then your arrows will drift to the right. The opposite will be true when you lean your top limb to the left. The more your bubble is off the further your arrows will drift off the centre. It can be a big problem if you aren’t centred. However, there are advantages to this if you do your homework and know how it affects your arrows. If you are an outdoor target shooter then your front sight bubble can come in quite handy with variable winds. Instead of having to click your sight to the right and to the left all day long, you should be able to know how much a quarter bubble or half bubble lean will drift your arrows to counteract the wind. This small tool has proven to put big medals around my neck many times!
Shooting field angles quickly teaches you the importance of your bubble alignment
Get a handle on it
Your bow hand is the first and last thing to determine the directional path of the arrow. If your bow grip hand is slightly off, either high, low, left or right, then your arrows will be the same. I can’t stress enough how important a consistent and repeatable front hand position is. I know people struggle with this and it shows in their groups and tuning. I have many students who struggle with getting a perfect bullet hole through paper, yet when I take their bow and shoot it then I get a perfect result. The difference is in the front hand position. There are different thoughts on hand pressure and wrist angles. With compounds I have found that the most consistency comes from an even disbursement of pressure in a neutral grip position. I find that high wrist positions cause inconsistency because it takes muscle to keep a high wrist, and muscle will become inconsistent as it fatigues and changes. Low wrist positions also can cause missed arrows if you are applying more heel pressure on one shot to the next. Heel pressure is also changed by where you grip the bow high and low. If your hand is up against the bottom of the riser shelf for one shot and the next time it is a centimetre away then it will cause a missed arrow. Once again, just the smallest of changes will give you a big miss. When I first grip my bow I first make sure to slide my hand all the way up until it hits the bottom of the riser shelf. Then I almost lean down onto my bow so that I apply even pressure throughout the hand where it is touching the bow riser.
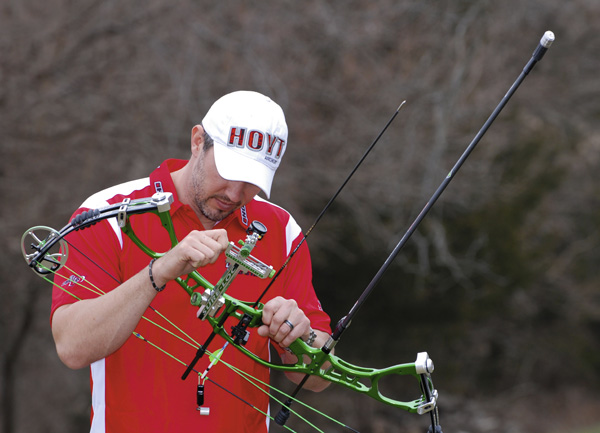
To aid in making sure your grip is torque-free, take advantage of your long rod. If you are using a longer stabiliser, set it on the ground and let the weight of the bow rest on the stabiliser. This lets your hand be free to place it where you want it without having to hold onto the handle. Then position your hand on the grip and make sure it looks like it’s in the right spot, and then lean on it to make sure it feels right. Everyone always asks why I shoot the length Fuse stabiliser I do. The answer is easy because I don’t have any science behind it. Simply put, I shoot the one that allows me to have the bow handle at the right height for me to comfortably position my hand while my stabiliser is on the ground. If you are shooting short stabilisers let the weight of the bow rest against your bow sling while you do the same. Too many times have I seen people pull their bow back and then move their hand around at full draw until they are in the position they want. This builds so much torque into a bow and will give you missed arrows left and right. I believe in a relaxed bow arm from the front elbow all the way to the fingertips. As a rule of thumb, if your knuckles turn white when you shoot then ease up the tension. Remember, the arm should look totally relaxed from the front elbow to the tips of the fingers. There is no reason to put a death choke on the bow. Keep your hand relaxed all the way through the shot.
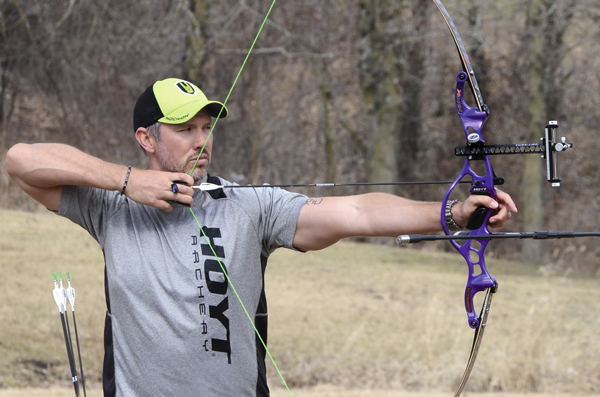
A relaxed bow arm and hand are essential for a torque-free grip
Final words of wisdom
In every sport I have ever done I have learned it is always the small things that add up the most. A good coach preached this to me every single time I would do something 90 per cent right but not 100 per cent. When I was on the American football field it was just inches that determined whether or not you scored with the ball. It was just inches that decided whether or not my pass was perfectly in the the hands of my receiver, or if I was just out of reach of a hand trying to grab me to drag me down. In golf it is just blades of grass that are the difference between a hole in one or a three put. I could go on and on about how all the small things matter in sports and even in life. Archery is a game of finesse and fine precision. You must consciously go over all the small details each and every shot. Some coaches believe in letting the subconscious take over and handle all these small details. I disagree with that; I know that a perfect eclipse, a sliver of a bubble on your level or a single wrinkle line on your hand is all that it takes to decide between the silver or the gold. I want you to be golden!