
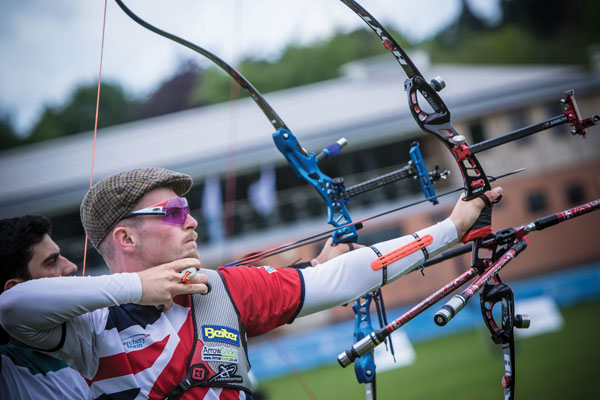
Patrick Huston explains why many archers end up thinking about the release the wrong way – and how to work towards a clean and consistent loose
This position is the most biomechanically efficient position and will cause the least movement away from your neck
The thing almost every recurve archer has spent hours fretting about is their string hand and how it releases the string. However, I can almost guarantee you that you have been going around trying to make it behave the wrong way. Most people will focus entirely on how they are wanting the hand to move after the shot. Technically this is not wrong, but it’s a symptom of the forces and pressures within the hand during your shot.
As archers we are not necessarily wrong to be looking at the movement of the hand after the shot. We should be looking for the hand to relax and let the string come out from under the fingers first of all. Then, we want the fingers and hand to come back close round the neck with minimal opening of the fingers. The Korean ladies are perhaps the best example of how this should be done. There should also be as little movement away from the neck as possible. This is the ideal. If your release looks like this you should have even and consistent string movement and few errors at the target end. However, there is more we can do to improve – but I will get to that soon.
First, I want to explain how to create this style of release. There are three main elements needed to make this release; proper placement of the string in the fingers, strong back tension, and continual movement.
1. String placement

The way you place your fingers on the string is a crucial factor in getting a consistent release
The most crucial element of this is that the string goes in exactly the same place in your hand each time. This is perhaps the most important factor! If your string is not in exactly the same place then the pressures of the shot will change and your release will vary. Consistency is the name of the game.
There is an optimum place to put your fingers: inside the first joint of your index finger, just behind the joint of your middle finger and then in the joint of the ring finger. You want to set your fingers in these positions with the string held very lightly, trying your best to NOT engage your fingers. Set your fingers in this position then let the tendons engage and your fingers will roll open slightly. This should happen, so let it. This position is the most biomechanically efficient position and will cause the least movement away from your neck.
I will add a note that a lot of archers don’t shoot in this position. I, for one, shoot a lot closer to my fingertips, but once I learnt this I’d been shooting like that for eight years, and shooting a lot.
2. Strong back tension

Correct engagement of the back muscles and motion through the clicker are two important components of the shot
The correct power going through your back is crucial to having a clean release. I strongly recommend you check out my previous article on bow training or my YouTube channel and the video on reversals for some guidance on how to build this up. I cannot stress this enough (you’ll find huge improvements in every element of your shot for being properly bow fit).
At full draw you want to be applying continuous force through the shot from your back so that when the clicker drops your hand is pulled back with the large powerful muscles in your back. If your back is not fully engaged then you are likely to have a dead release, which will cause nasty left and right arrows.
When the clicker drops you want to think of one of three things: the string going straight through your fingers, going round your fingers or your fingers relaxing. Don’t think of opening them to let the string out, as that is not necessary. The string will knock your fingers out of the way, and with correct back tension your release will be flawless.
3. Continual movement
A relaxed hand and wrist can help eliminate the minor changes in the passing of the string that can occur when they’re tense
This is part and parcel of having correct back tension, but the idea of a clicker is that the correct recurve shot is created and finished by movement. When at full draw you want to be aiming at the middle of the target subconsciously while moving through the shot using the muscles in your back. Then the clicker drops and fires the releasing mechanism in your forearm. Most importantly, the back then continues to pull in continuous motion through the shot.
This ‘execution’ is the pinnacle of the recurve shot: the fact that at the moment of execution both the back hand and the front hand break the shot evenly from both sides.
To create this the archer must have continuous application of pressure just before, during and after the click happening. This is crucial. The clicker should create no direct changes in the body apart from the relaxation of the forearm muscles to allow the string to escape the fingers.
If the archer has not loaded the back correctly then this is very difficult to make happen. The bicep and delts might be strong enough to pull through the clicker, however, they are not capable of continuing the motion of the shot.
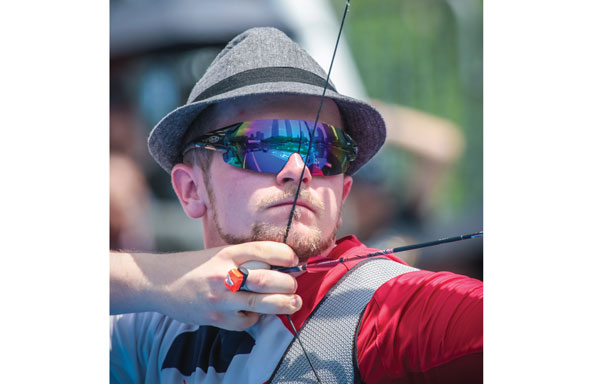
Now for the bit that most people don’t fully understand – tension. Almost every recurve archer has far too much tension in their wrist, and therefore in their fingers. Even though it is perfectly doable to shoot at a very high level like this, it can create a huge amount of minor errors. For example, I never used to be able to shoot bare shafts for groups at 70m. Since I learnt to relax my string hand I can group bare shafts great! This is because with tension in these areas, while you might be able to group with 30 per cent tension on average, this can vary from 20-40 per cent and cause minor changes in the passage of the string. With fletched arrows this is a lot less noticeable, but bare shafts really show this up.
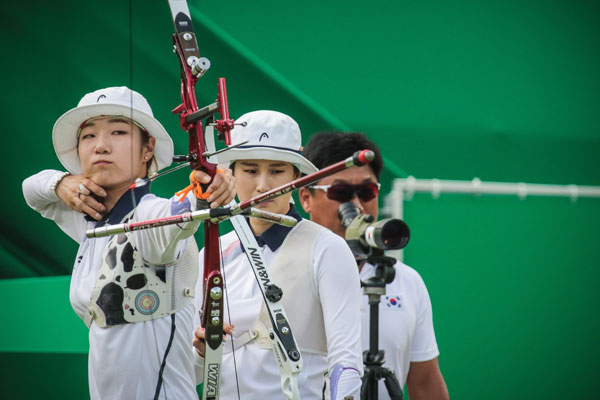
The Korean women’s team is a great example of a release that stays tight to the neck
It is a long and arduous task to teach people to relax their wrist, though the rewards are worth the work. The first thing to look for is the hand curled as if trying to grip an apple. The second is the wrist being bent backwards towards the forearm. Either of these positions will create tension into the forearm. The position easiest to have is a relaxed forearm with the wrist bent in slightly towards the inside of the arm, with the fingers pushed back slightly to be parallel to the forearm. Then make sure the muscle around the thumb is soft and the little finger not stiff either.
This is the ideal, but it is not absolutely mandatory. Most people will struggle to relax their hand even if they manage this shape. One of the best ways to teach people to relax their hand is to create excess tension in it and then relax it off. So basically draw up and squeeze like anything and then soften your hand. Do three shots doing this and then shooting the arrow as usual. Then three normal arrows, then three with the squeezing. Over a period of time, maybe an hour of shooting, you should be able to create the relaxed wrist feeling without the squeeze to begin with, though this may take multiple sessions so don’t worry if it doesn’t happen straight away. Once you have achieved it properly for two or three consecutive shots you will understand how much better it feels and be totally committed to this style of shooting from now on.
I can promise you that regardless of how else you have set up your shot, if you have good continuous back tension and a relaxed hand then the release will improve hugely. Instead of teaching people what a release should look like we need to focus on teaching them how to create it, and in my opinion the biggest thing holding most people back is the tension in their wrists.
I hope this article helps anyone else who has ever struggled with ‘loosey goosey’ releases, as my first coach would say!
This article originally appeared in the issue 115 of Bow International magazine. For more great content like this, subscribe today at our secure online store www.myfavouritemagazines.co.uk
[…] Read: Top Tips For Recurve Release […]