
Shooting with a thumb draw is both a traditional and practical element of shooting a horsebow. Dan Sawyer breaks down how to get started…
The main mistake made by those trying the thumb draw for the first time is to grip the thumb with the index finger
Many archers, at some point or another, have a go at shooting a horsebow. Getting into the spirit of the thing, they will often try shooting with a thumb release and as often as not they will find that they cannot draw anything like their normal draw weight and that their thumb ends up sore and/or swollen after only a few shots. This is almost always as a result of poor technique, sometimes with a side order of poorly fitting thumb ring.
Why Thumb Draw?
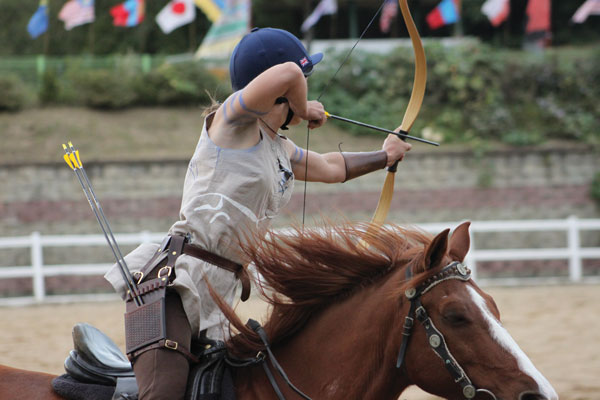
There are three reasons to shoot with a thumb draw. The first is simply that it is traditional. The second, more practical reason is that many horsebows are short but designed for a long draw. Pulling them with a three fingered draw generally leads to significant finger pinch, but this is not a problem with a thumb draw as only the thumb hooks around the string. The third reason is specific to use on horseback: when shooting with fingers the arrow has a tendency to blow off the knuckle of the bow hand as soon as the horse speeds up. This can be countered by using a deep hook and/or curling the index finger around the arrow shaft to hold it on but when shooting with a thumb draw the arrow is placed on the other side of the bow and the airflow at speed simply blows the arrow harder up against the bow, removing the issue altogether.
Thumb Protection
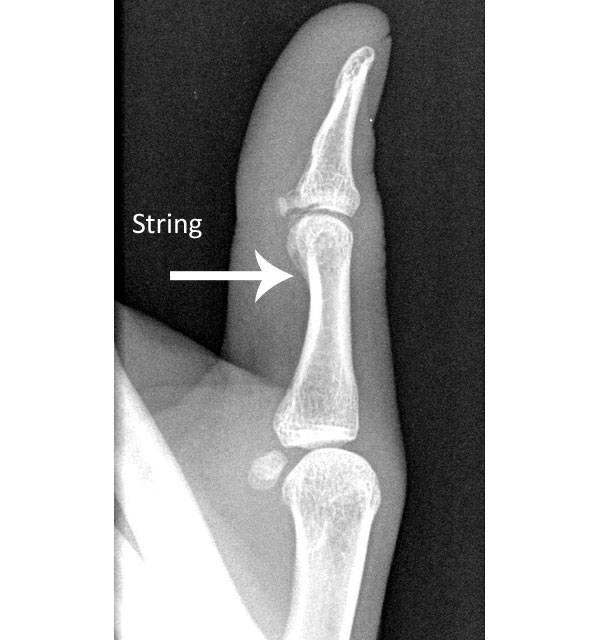
I’ll deal with thumb rings in a later article but the best way to start is by taping your thumb. You can use a basic hockey tape or something more padded like Elastoplast tape (other brands are available…), whichever you prefer. Two to three wraps of tape around the proximal phalanx of the thumb (see photo 1) should be enough. Some people also like to wrap the pad of the thumb to protect it from the string’s passage but with good technique this should not be necessary.
Nocking the Arrow
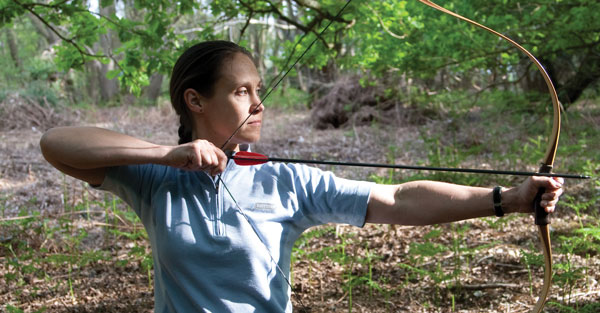
When nocking the arrow, remember that for a thumb draw the arrow goes on the other side of the bow from normal: it rests on the knuckle of the thumb of the bow hand, not the fingers. You may also want to wear some form of bow hand protection to start with – the different release means that your usual nocking point may not be at the correct height, which can lead to the fletchings (which should be feather, as with any shooting off the knuckle) scraping the bow hand as they pass.
If your thumb hurts, swells or bruises when shooting then you should immediately stop
The Thumb Lock
The main mistake made by those trying the thumb draw for the first time is to grip the thumb with the index finger. As soon as you start to pull the string, this grip means that all the weight of the bow is going through the thumbnail and often being held by the knuckle of the thumb. This hurts and can lead to injury. If your thumb hurts, swells or bruises when shooting then you should immediately stop, as you may be causing yourself serious injury.
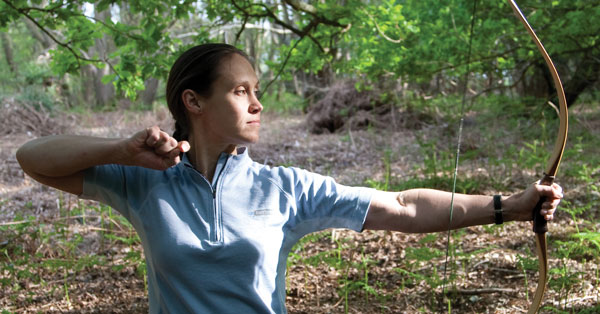
Instead, first curl the little-, ring- and middle fingers up as though making a fist. You should now be making an “L” with your index finger and thumb. Next, with the index finger still extended, curl the thumb around the string. The string should not sit in the bend of the thumb but on the phalanx, where you put the tape (photo 1, previous page). Now press the tip of the thumb into the side of the knuckle of the middle finger (see photo 2). This is where the strength of the thumb lock comes from: the muscles at the base of the thumb press the thumb into the middle finger, rather than the index finger pushing against the nail.
The index finger rests lightly on top of the thumb (see photo 3). It should remain relaxed throughout the draw and release. This is important: if your index finger is tight and pulling back on the thumb then you may well hurt and/or injure your thumb, but even if you don’t, the finger will interfere with the release if it is not relaxed. Only when drawing really heavy bows with a thumb ring should you need to enlist the aid of the index finger to hold the thumb in place. This is not something you should try without training as serious injury to the thumb can result.
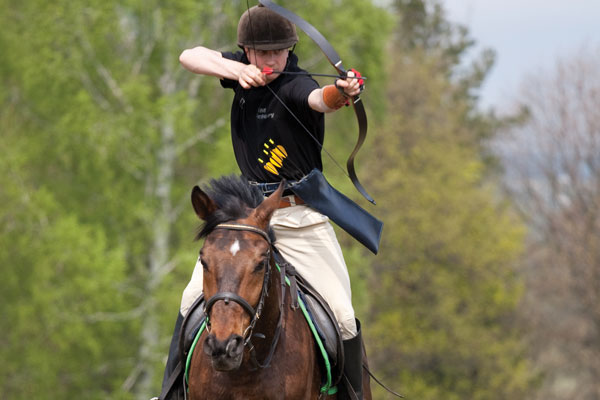
Short horsebows can often give significant ‘finger pinch’ when shot in the Mediterranean style
Draw
You can now draw the bow in exactly the same way as you would with a Mediterranean draw. You may need to cock your wrist outwards to stop the string from slipping along the thumb into the crease of the knuckle, but the usual principles of straight lines, skeletal strength, and back tension all apply.
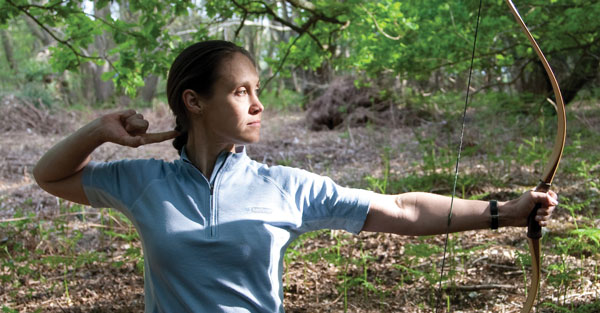
It is important to keep the back of the hand flat, with the knuckles horizontal, as you draw (see photo 4). There is a tendency, especially among beginners, to allow the hand to rotate, with the palm turning towards the face slightly. This does two things: it brings the fingers into the way of the string so that it hits them on release and it twists the string in a way that often causes the arrow to fall off the bow hand. If anything, the hand should be rotated slightly palm out as you draw, thus keeping the fingers away from the string. The index finger, still resting lightly across the thumb, presses gently into the arrow shaft, holding the arrow in place as you draw.
Release
To release, you can simply relax the draw hand and pull through as usual. So long as your index finger is relaxed, the string will push past your thumb exactly as it pushes past your fingers in a Mediterranean draw.
One variation that can be used (and should be used if you are shooting with a thumb ring) is to twist the wrist of the draw hand as you release. When using this method, the hand rotates so that the palm points away from you. This is shown in photos 4, 5 and 6. Note that the little-, ring- and middle fingers are still clenched, while the thumb and index finger form a crescent. Done properly, this method makes for a smoother release, especially when shooting with a thumb ring, since it enables the string to slip off the ring more easily.
Step-by-Step: The Thumb Draw
Step 1: You want the string to sit behind the bend in the thumb, on the phalanx

Step 2: Press the tip of the thumb into the side of the knuckle of the middle finger – this is where the strength of he hold comes from

Step 3: Lightly rest the index finger on top of the thumb
Step 4: It’s important to try and keep the back of the hand flat and knuckles horizontal
Step 5: Most elements of the draw are the same as with the Mediterranean style – including the hand needing to be relaxed on release
Step 6: A variation on the release is to twist the hand so the palm points away from you
Dan Sawyer is the President of the British Horseback Archery Association (www.bhaa.org.uk) and a three-time national champion, as well as a former World bronze medalist with Team GB. He is co-editor of the BHAA’s manual “Horseback Archery: ancient art to modern sport”, which covers all aspects of horseback archery from technique to history and is available to buy from Quicks.
This article originally appeared in the issue 120 of Bow International magazine. For more great content like this, subscribe today at our secure online store: www.myfavouritemagazines.co.uk
I want to shoot with a thumb ring but I am having trouble finding entry level horsebows in the US. Can I simply use a left handed recurve bow? I am right handed.
Hey Dawn,
You can find a relatively cheap fiberglass bow for entry level archery at places like nomadwarriors.com, or even amazon.com. they are just around $100 or cheaper.
Getting into thumb rings is a lot of fun. I got mine from customthumbrings.com and they do great work while shipping quickly.
the pse snake bow can be drawn to 30″ draw and is both left and right handed. should be available for under $50.
https://www.youtube.com/watch?v=Lh3-wbl9FGk
Does thumb draw impact on spine of arrows needed?
I have found that the spine of the arrow isn’t much of a big deal with thumb draw. I can shoot 200-600 spine arrows with my 45 pound Korean bow, and not notice much of a difference.
When using a proper grip, you will perform a style of follow-through, khatra/Hatra, that will essential get the bow out of the way of the arrow and produce a straight flight path. There are quite a few videos on youtube about it.
Most important thing is gripping the bow correctly, and letting the grip perform the action and not forcing your hand to move out of the way.
Correction on my previous statement I can shoot between 400 and 600 spine arrows and not experience too much of a difference on fletched arrows. If you go bare shaft, you’ll experience some issues.
You can perform more extreme grips to help navigate some of the flight issues, but it just won’t be that comfortable without a lot of practice.
I did try some bare shaft tuning with my 48# @30″ Simsek Sipahi bow. The bow prefers a weaker shaft for thumb draw. 48# Mediterranean would lean toward 500 spine arrows. Mine bow likes a 600 spine arrow with a 175 grain tip on a 30″ shaft. The 3rivers archery dynamic spine calculator was pretty spot on.
@Dawn you can find an ambidextrous bow that will serve the same purpose at lancasterarchery, the Arc Rolan Recurve bow at 22#.