
Since I looked at the effect of nock fit on group sizes by shooting arrows fitted with worn nocks through the Hooter Shooter, then comparing the groups to those shot by arrows with new nocks, I’ve been using a tool to help me better discover which nocks I should use – and which I should throw away!
If you’ve got the bits to make one – or can source them – this tool doesn’t take 10 minutes, and set to become an invaluable piece of kit in my tool box.
Archery is, fundamentally, a precision sport – so why not take advantage of all the extra points you can get!
Components:
- A fairly-stiff elastic band
- An old arrow that’s not damaged at the back end. You need the nock-holding part of the shaft to be fully intact.
- A section of clear tube (an Easton arrow tube, with cap, is ideal)
- Super glue
- Shrink wrap (that shrinks with heat; it gives the best fix, I find)
- A transparent ruler
Step one: Cut the arrow to nine inches and glue a rubber band to the back end
Step one
Cut the arrow, from the front, to approximatly nine inches in length. It’s important that the nock-holding end of the arrow is still in good condition – but since you’re losing the front end, an arrow you’ve nicked when shooting would do perfectly.
Glue about one centimetre of the elastic band to the CUT end of the arrow.
Step two
Put some shrink wrap round the join between arrow and elastic band and heat it gently until the shrink wrap is tight – this should make the bond extremely secure.
Step two: Use heat shrink to strengthen the bond
Step three
Step three: Cut an arrow tube to a similar length
Cut your tube – I’ve used an Easton arrow tube – to about the same length as the arrow you did previously. It’s not to protect the arrow at all, but allow the arrow inside to move around freely.
Step four
Fix the rubber band at one end of the tube. You could use strong tape, but in this instance I’ve just pushed the cap for the arrow tube in around the rubber.
Step four: Fut the rubber band around the end cap to secure it
Step five
Attach the see-through ruler to the outside of the tube. The start of the scale should line up with wherever you’ve fixed the elastic band. And that’s all!
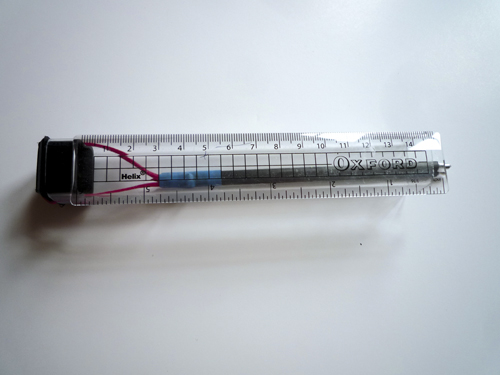
Step five: Stick a see-through ruler to the outside
In use
Now you can test all your nocks. Install each into the end of the arrow, then clip them onto the string. Pull away holding the tube, and the elastic band will stretch, until the nock pops off.
By marking off how much stretch most of your nocks need, you’ll be able to identify any that don’t fit as well, or too well, compatred with the majority. Don’t shoot these – as they’ll cost you points downrange!
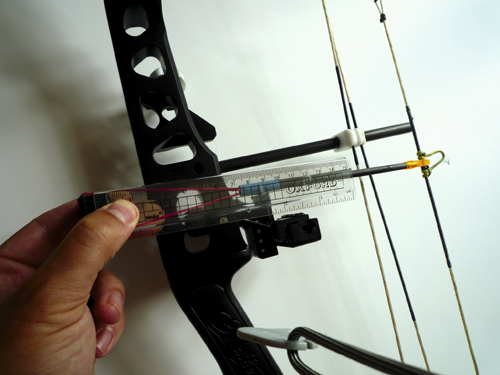
In use: Measure how much the band stretches