
For many new archers, their first outdoor season presents a number of challenges. Andrew Smith breaks down the most common, and what to do about them.
If you have done your basic bow set up and your arrows are the correct spine, most of the adjustments and changes required are archer related, not equipment based
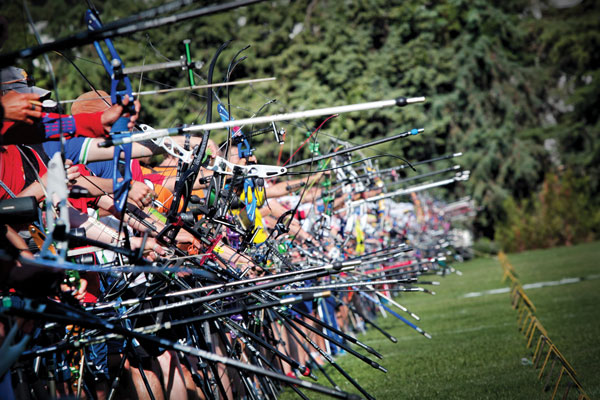
For first timers, the transition from the indoor season to outdoors can be quite a shock. This is often not so much due the foreseeable complications of the elements and shooting the longer distances, but why the addition of a seemingly small 10 or 20 metres can widen arrow groups a lot more than expected, especially compared to arrow groups shot indoors, leading to a negative conclusion about ongoing progress.
Others fall in to the trap of expecting scores shot indoors to equate to what they should be shooting outdoors. Everyone at any level can fall into this trap, especially if you have shot enough scores indoors to get a handicap. What tends to happen on a dark cold evening is that archers start to cross reference their indoor handicap with outdoor rounds. I will say no more other than that most archers’ indoor scores will be better than their outdoor scores and handicap.
Shooting outdoors is more difficult; more care is required when you set up and execute each shot. Shooting flaws, possible errors in bow set up or arrow selection are all magnified when the arrow has to travel further. The weather adds an additional element, and fatigue also comes into play. At most clubs, you will shoot six arrows outdoors before you collect, and don’t forget you will be walking a lot further to score and retrieve your arrows.
It is fair to say that if you have done your basic bow set up and your arrows are the correct spine, most of the adjustments and changes required are archer related, not equipment based. So, to be prepared, what should you look out for?
1. Bend at the waist
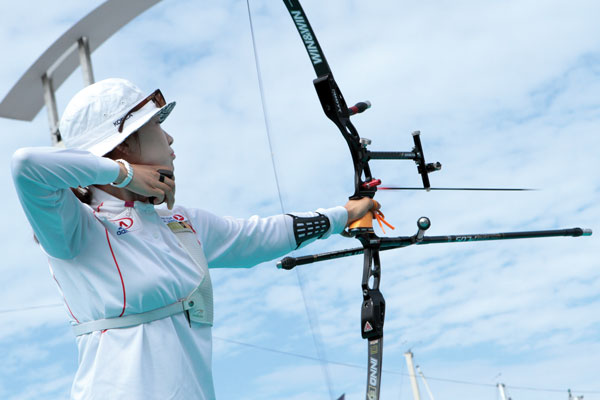
One of the most common errors employed to elevate the bow is to raise the bow arm rather than keeping good “T” form and tilting at the waist
To start with, it is important to realise that the way you have been shooting indoors is no different to what you do outdoors. The “T” shape that you have mastered indoors is the same, the only difference is how you get the elevation to raise the bow to send the arrow further down the range. So, do not forget the “T”.
Modern bows and arrows are quite efficient, so the angle of elevation is not that great. It is not until you go out past 50m where the type of arrows you use and the bow draw weight will have more of an influence. One of the most common errors employed to elevate the bow is to raise the bow arm rather than keeping good “T” form and tilting at the waist. If you just raise your bow arm to increase elevation you shorten your draw length and put everything about your draw out of line.
So, to get the elevation, keep the “T” of your draw, whether you are shooting 18m or 90m and tilt at the waist – though without pushing the hips forward or arching the back. If you plan to use a clicker in the future this will mean that you will not be changing its position for each distance and you will achieve a cleaner shot.
2. Bow hand position
Tipping backwards is no good for arrow clearance
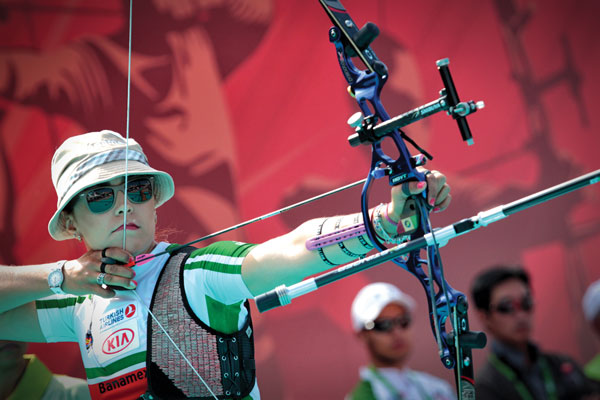
Gripping the bow or conversely, doing the opposite, where your fingers are tense and pointing straight out, will create tension and torque in the bow hand. Both scenarios will create movement and twisting of the riser when you let go of the string. The best hand position is to use the shape of the grip and let the hand relax into its contours, paying attention to the parts of the hand that should be touching the grip, the thumb pointing to the target and the knuckles at 45 degrees.
A simple test: if you cannot wiggle your fingers at full draw then there is too much tension in your hand. Not gripping the bow means that you will have to use a finger or bow sling to stop your bow bouncing down the range after the shot. For most bow designs the centre of gravity of the bow at full draw is behind the grip, so when you release the bow it will want to tip backwards and the top limb/string will hit you on the head. This tipping backwards is not good for arrow clearance.
To counteract this, most bows are designed to be shot with at least a longrod, so I would suggest fitting one. Not only will it cure the tipping backwards, it also helps to stop the riser twisting from small pressures in the bow hand and will improve your groups.
3. Forcing the arrow to fly further
Don’t draw the string back further than you did indoors to try and get the arrow to go further
There is a temptation to draw the string back further than you did indoors to try and get the arrow to go further. However, this is counter-productive and will actually make things worse. A common symptom of this is if you find that you have started to hit your bow arm with your string by way of extending the bow arm to draw back further. If this is the case then you need to revisit how you set up your bow arm and elbow rotation; sometimes, with everything else going on, rotating the elbow gets forgotten and leads to a weak bow arm and collapsing during the shot.
4. Feet position
Line up your feet with your target correctly
Feet position and making sure you are correctly lined up with the target has a significant bearing as to where you are really aiming and where your bow arm will end up after the shot. Tree lines and the way the grass is cut can create optical illusions, and can fool you into thinking you are in line with the boss even when you’re not. So, take care and make sure you stand in the same position each time you go on the shooting line. To help, you can use foot markers to stay consistent, and ideally you should not lock out your knees as this will make you less stable in the wind.
5. The back sight
High or low shots can be as simple as shooting with your mouth slightly open or closed
Unlike rifle shooters, recurve archers do not have a single back sight to line up with the front sight pin, so what I’m referring to as ‘the back sight’ here is actually a combination of the following: the position of the string on the face, the position of the hand under the chin, the string picture, posture, and a good release. Moving any of these elements even by a small amount will cause your arrows to fly off line.
The fuzzy image of the string you see when aiming should always superimpose itself on the same point on your riser each time you shoot. Moving it left or right will move your point of aim left or right even if your sight pin is still on the gold.
High or low shots can be as simple as shooting with your mouth slightly open or closed, or your hand not tight enough under the jaw. These small differences will change the distance and angle of the eye to the top of the draw hand. High shots will be the result of having the mouth open, and vice versa for low shots.
6. Sight marks
Always record your sight marks in a notebook
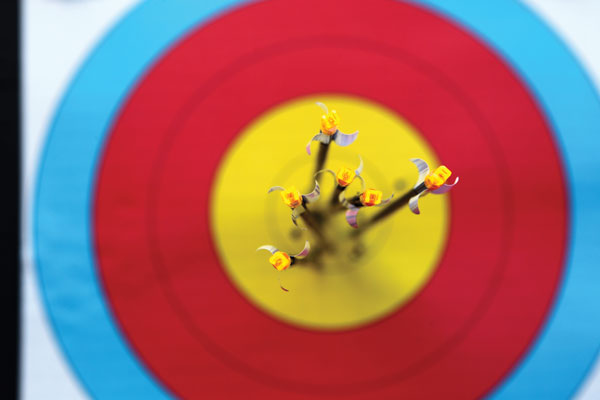
Most points are lost during a round when you change distances, so it is important to record your sight marks in a notebook. You can then refer to these and make the correct adjustments. As you get more consistent, your sight marks will be very similar each time you shoot, and at this point you might even be able to mark these on your sight (some have a white strip where you can mark each distance).
7. Dropping the bow arm
The follow-through, as in most sports, is of utmost importance
Archery is no different to most sports, in that the follow-through important. In archery, a good follow-through is the confirmation that you have executed all the processes correctly. Keeping the bow arm up for the second or so the arrow is in the air will ensure that you are not dropping the arm before the arrow has left the string, a major cause of unexplained low shots. One of the great joys of archery is watching an arrow fly and seeing it hit dead centre.
Unfortunately, if you do this when you shoot your own arrows you will not finish the follow-through correctly, sending the arrows down the range erratically. A greater joy is when you get it right and you can feel the effortless nature of the shot knowing that it is in the gold.
8. Clickers
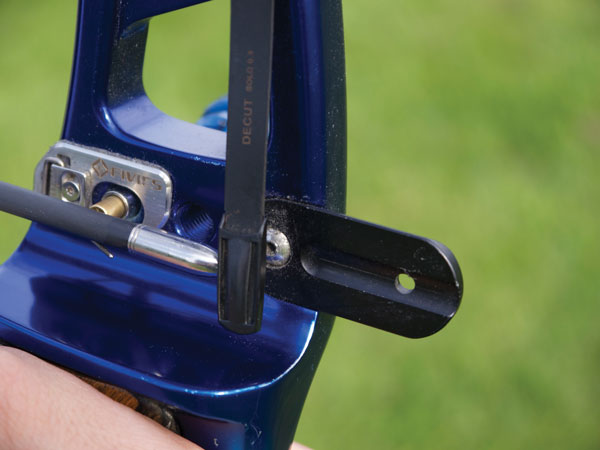
A clicker will help you to shoot more consistently and get tighter groups
To finish, a common question – will using a clicker help grouping at the longer distances? The simple answer is yes, it will help you to shoot more consistently and get tighter groups, the main reason every archer at the Olympics used one.
In its simplest form a clicker is just a draw check device, helping you to draw the arrow back the same distance each time. However, if it was that simple, it would be a must-have on every bow – but this isn’t always the case. Some coaches advocate fitting one as soon as possible, others never suggest using one. The key to good clicker use is how it is set up and positioned to promote good form. The most important aspect of introducing a clicker is the support and help you receive while learning to shoot with one. I look upon a well set-up clicker as a device that confirms whether your pre-shot cycle is correct and whether to continue with the shot or abort. When things are going well shooting with a clicker is a breeze, but if not, then you might be doing something wrong.
Shooting outdoors brings more challenges to accuracy than the sterile environment indoors, so here I have highlighted a few adjustments and considerations that should help you on your way to higher scores.