
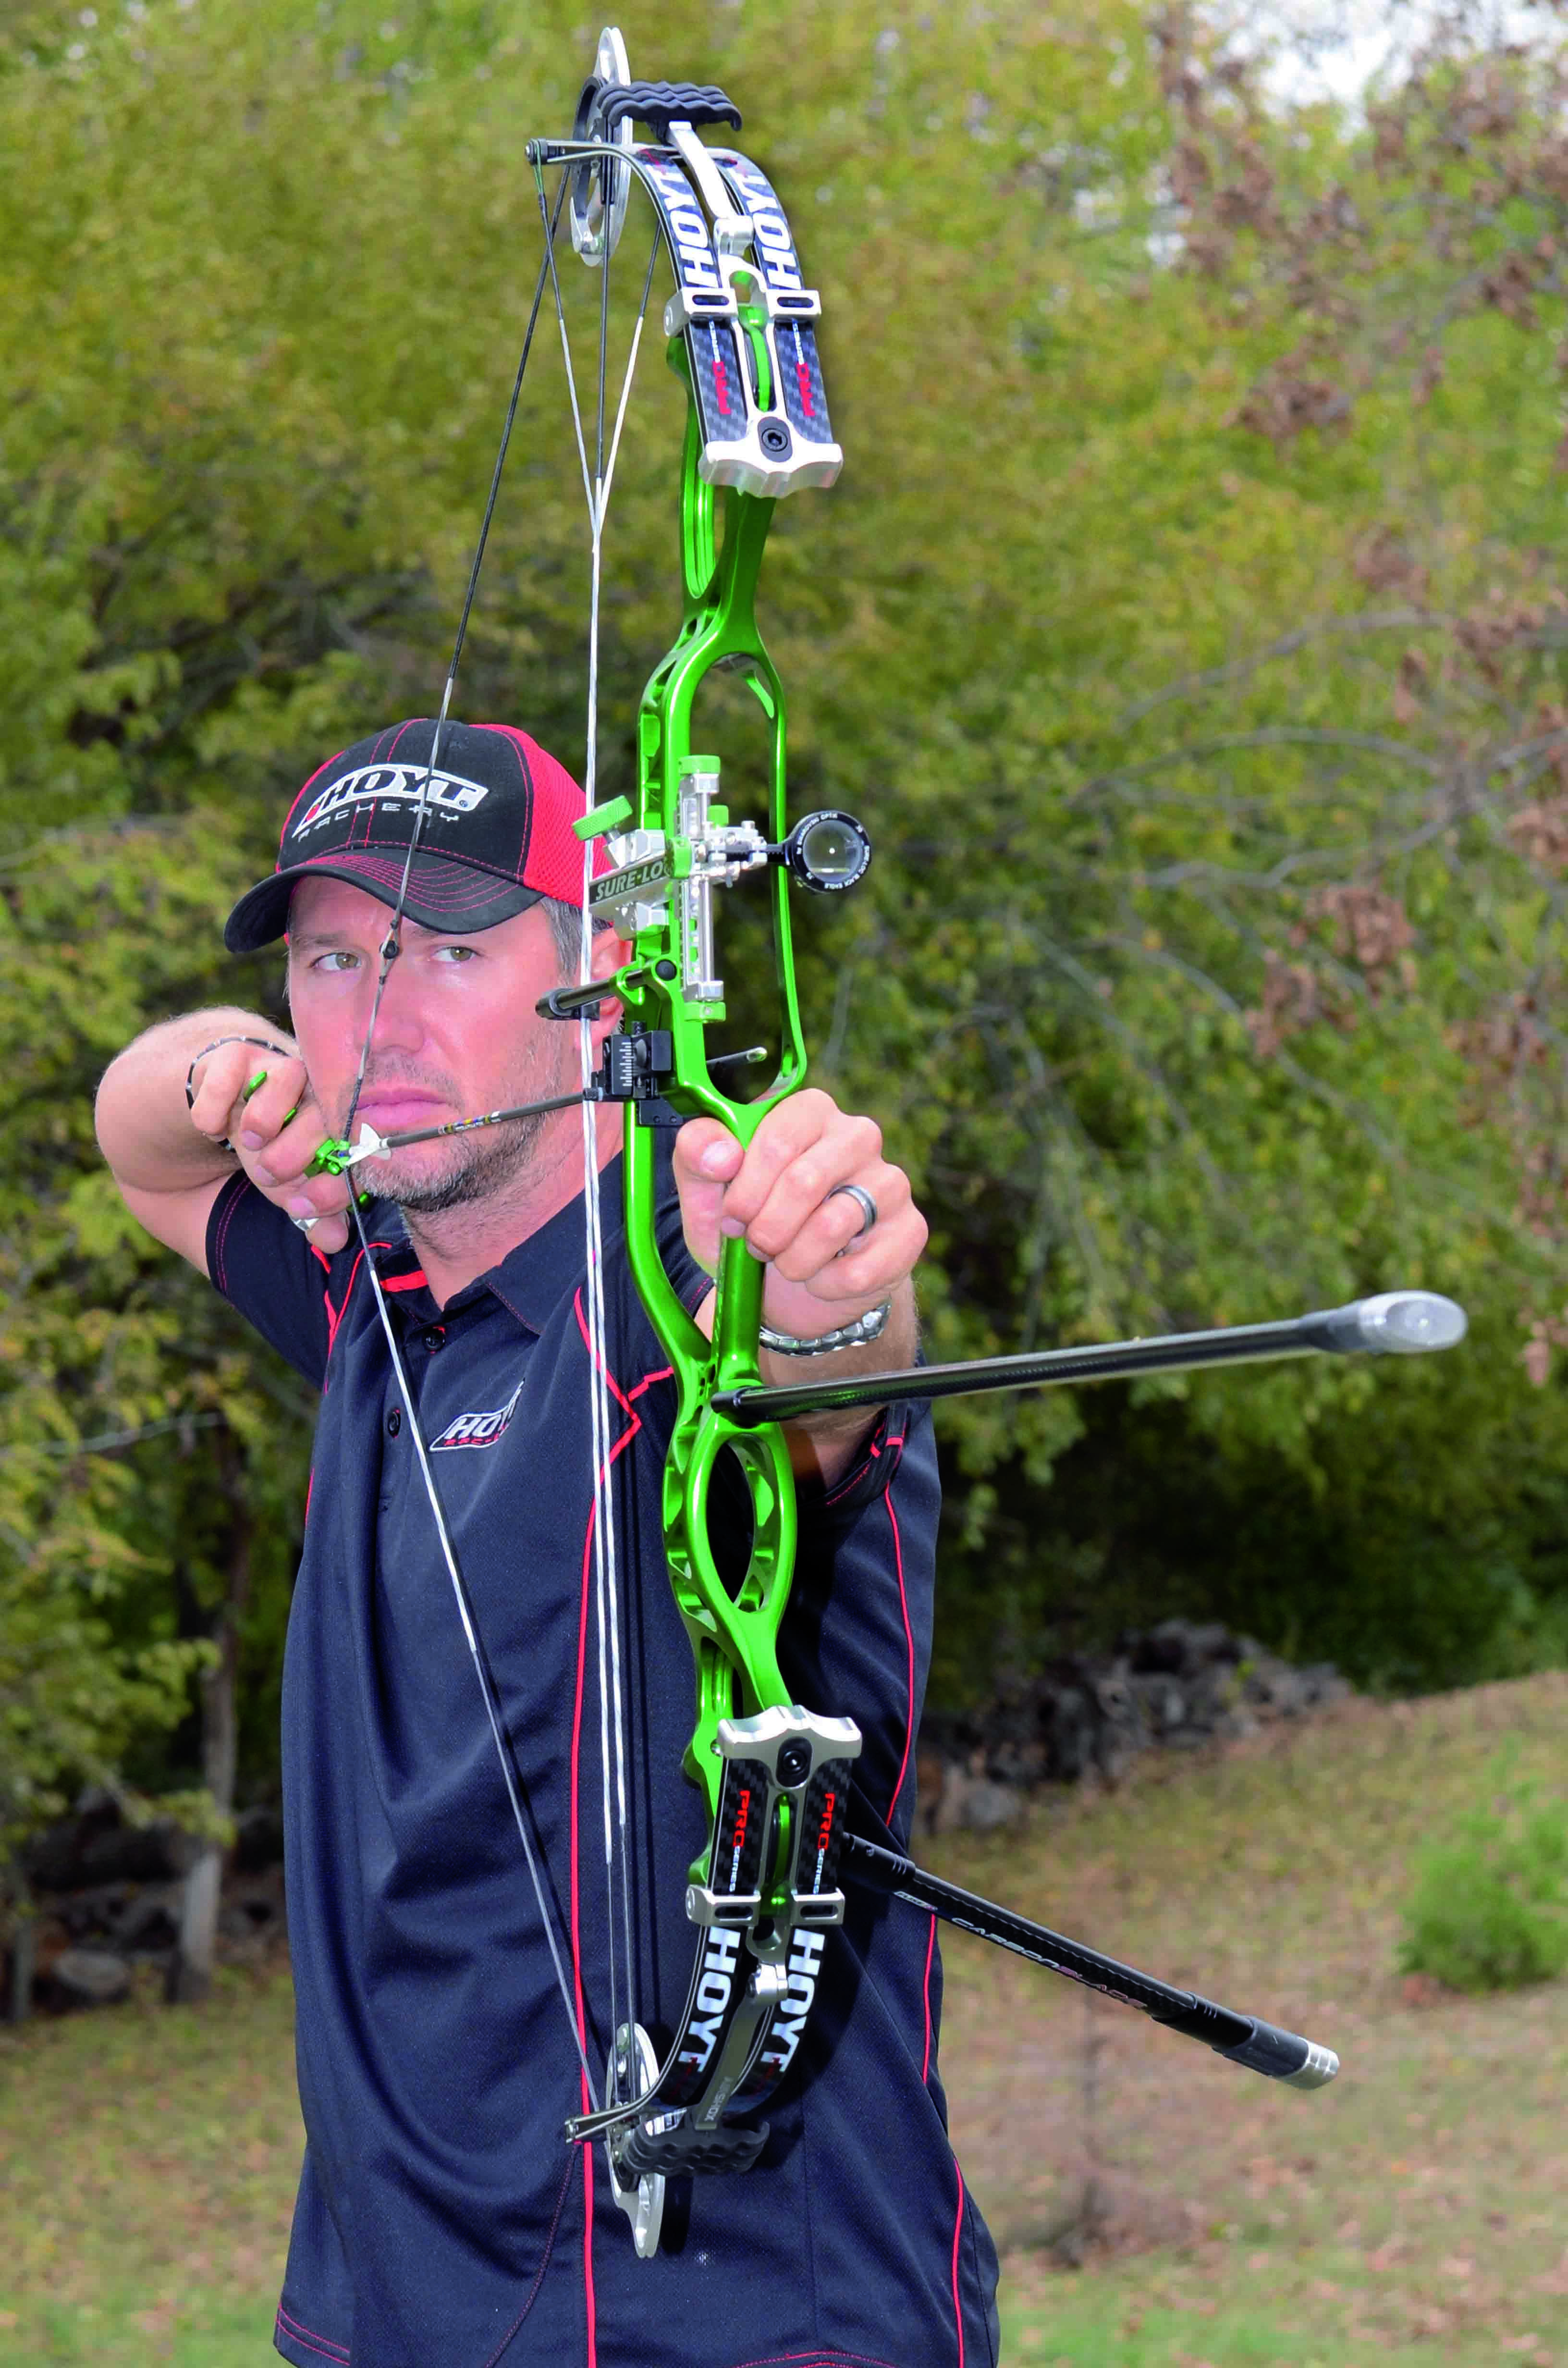
Master your measurement – perfect draw length is essential for a T-formation
Archers can struggle with common problems, whether they’ve shot for one week or 20 years. I know, because I still to do them myself after 15 years as a pro. Regardless of how long you’ve been shooting, it’s easy to make the same critical mistakes you did when you started. I want to touch on the five key things that impact overall performance; each of these key points are areas that we tend to forget about as we shoot for longer and begin to worry about more advanced parts of our form or equipment. However, you should never neglect the basics or the essentials! These five things are both.
Master your measurement
The number one key to being your best is making sure your draw length is measured up correctly. This seems simple, since the first thing most archery shops do the day you start is measure your draw length. However, as you continue to get better, the more you can fine-tune your draw length. You lengthen it and it feels good, but if you hit problems you might shorten it to get it feeling good again. Back and forth, back and forth – draw length can be a vicious cycle and can be frustrating. However, if you master your draw length and learn it and stick to it, you will really reward yourself.
The important thing about draw length is to maintain a T-shaped posture. What I mean by this is having your arms and torso in the shape of a T. You want your front arm to be straight but not hyper-extended. Your bow arm elbow should be soft but not bent. The reason I shy away from bent elbows is that it is easy to be irregular in length when you are trying to bend an elbow the same amount each shot. I know there are some top pros, and even some coaches, that promote this, but the average archer that isn’t shooting 500 arrows a week and monitoring every shot will struggle to replicate this with any consistency. The front arm is important and keeping it straight will keep you out of trouble.
In addition to having an erect torso and a T-shaped posture it is also critical that you have a vertical head position. If your draw length is set correctly, the string will stop slightly past the corner of your mouth, depending on the string angle of the bow. Then, if your head is in a vertical position, at anchor the string will touch the tip of your nose and the string will be on the corner of your mouth. If your draw length is too short your head may have to be tilted forward to get the string on your nose. If your draw length is set too long, the string will be too far past the corner of your mouth and the string will rest on the side of your nose. Keep your torso straight (don’t lean) and the front arm straight and soft. Then, with a straight head position, the bow should be set to fit you so that the string is slightly past the corner of your mouth at full draw, allowing the tip of your nose to touch the string. If you can get set up like this every time, you have mastered it.
Balance the bubble
Each time I watch other archers shoot I am amazed at how few actually pay strict attention to the bubble in their scope. Bubbles are extremely useful. If you want to improve immediately at longer distances, and especially on field ranges, then be sure to balance your bubble. If your bubble is half one way on one shot and half the other way on another shot then your variance is a full bubble. That is a lot! A good way to prove this for yourself is to stand on a shooting line and shoot a group while intentionally tilting your bow so your bubble is on one side of the scope. Then shoot another group while tilting it to the other side and see the impact it has.

A centered bubble is critical for a centered arrow
An easy way to improve your scores is to really pay attention to keeping your bubble centered each and every shot. If you feel like it is a struggle to balance your bubble at full draw, then you may either have your bubble adjusted incorrectly, or you are fighting the natural balance of the bow. Make sure you are correctly setting up your bubble on the sight, and make sure your third axis is set correctly. There are some good articles out there on this, including one from me that you can find at www.dudleyarchery.info. In addition to having the sight bubble set the correct way, play with side rod position and end weights on your stabilisers to help level the bow.
If you are a field shooter and struggle with your bubble in up and down terrain and side hills, then here is a good pointer for easier bubbling. Always draw your bow with the top limb tilted slightly towards the hill. Then, as you anchor in and relax into your shot, gravity will naturally straighten the bow out. A common mistake is letting gravity lean the bow away from the hill before you draw back, leading to you fighting the bow and applying a lot of torque to level it back. So, draw tilting the top limb into the hill, and bubbling will be easy once you are all anchored in: gravity will help you.
Grip it, don’t grab it
An area I continue to forget about from time to time is my front bow grip. There are two things here that are important. First, you really need to make sure that you are holding your bow so that the grip or riser is on the thumb side of the lifeline of your palm. The grip should rest along the thumb bone and where it connects into the wrist. You don’t want the grip crossing over the other side of the palm. A good way to know the proper position is bend your pinky straight down onto your palm and take note of where it touches. Don’t let the grip of riser touch that part of your palm. If it is, then you are too deep into the grip and turning your palm too far. It will cause your bow arm to come in line with the string path, and makes it likely you will hit your arm with the string when you shoot.
Aside from the hand position in the grip, you need to be mindful of being relaxed in the bow arm from the elbow all the way through the fingertips. Keep the fingers loose and curled while relaxed. Learn to keep that hand relaxed all the way through the shot. Let the bow’s natural reaction occur when the bow shoots. Don’t grab the bow. This is an easy mistake to make and, believe it or not, it does affect where the arrow goes. It has been proven time and time again through slow motion video that a relaxed bow hand is critical to centering the arrow in the target.
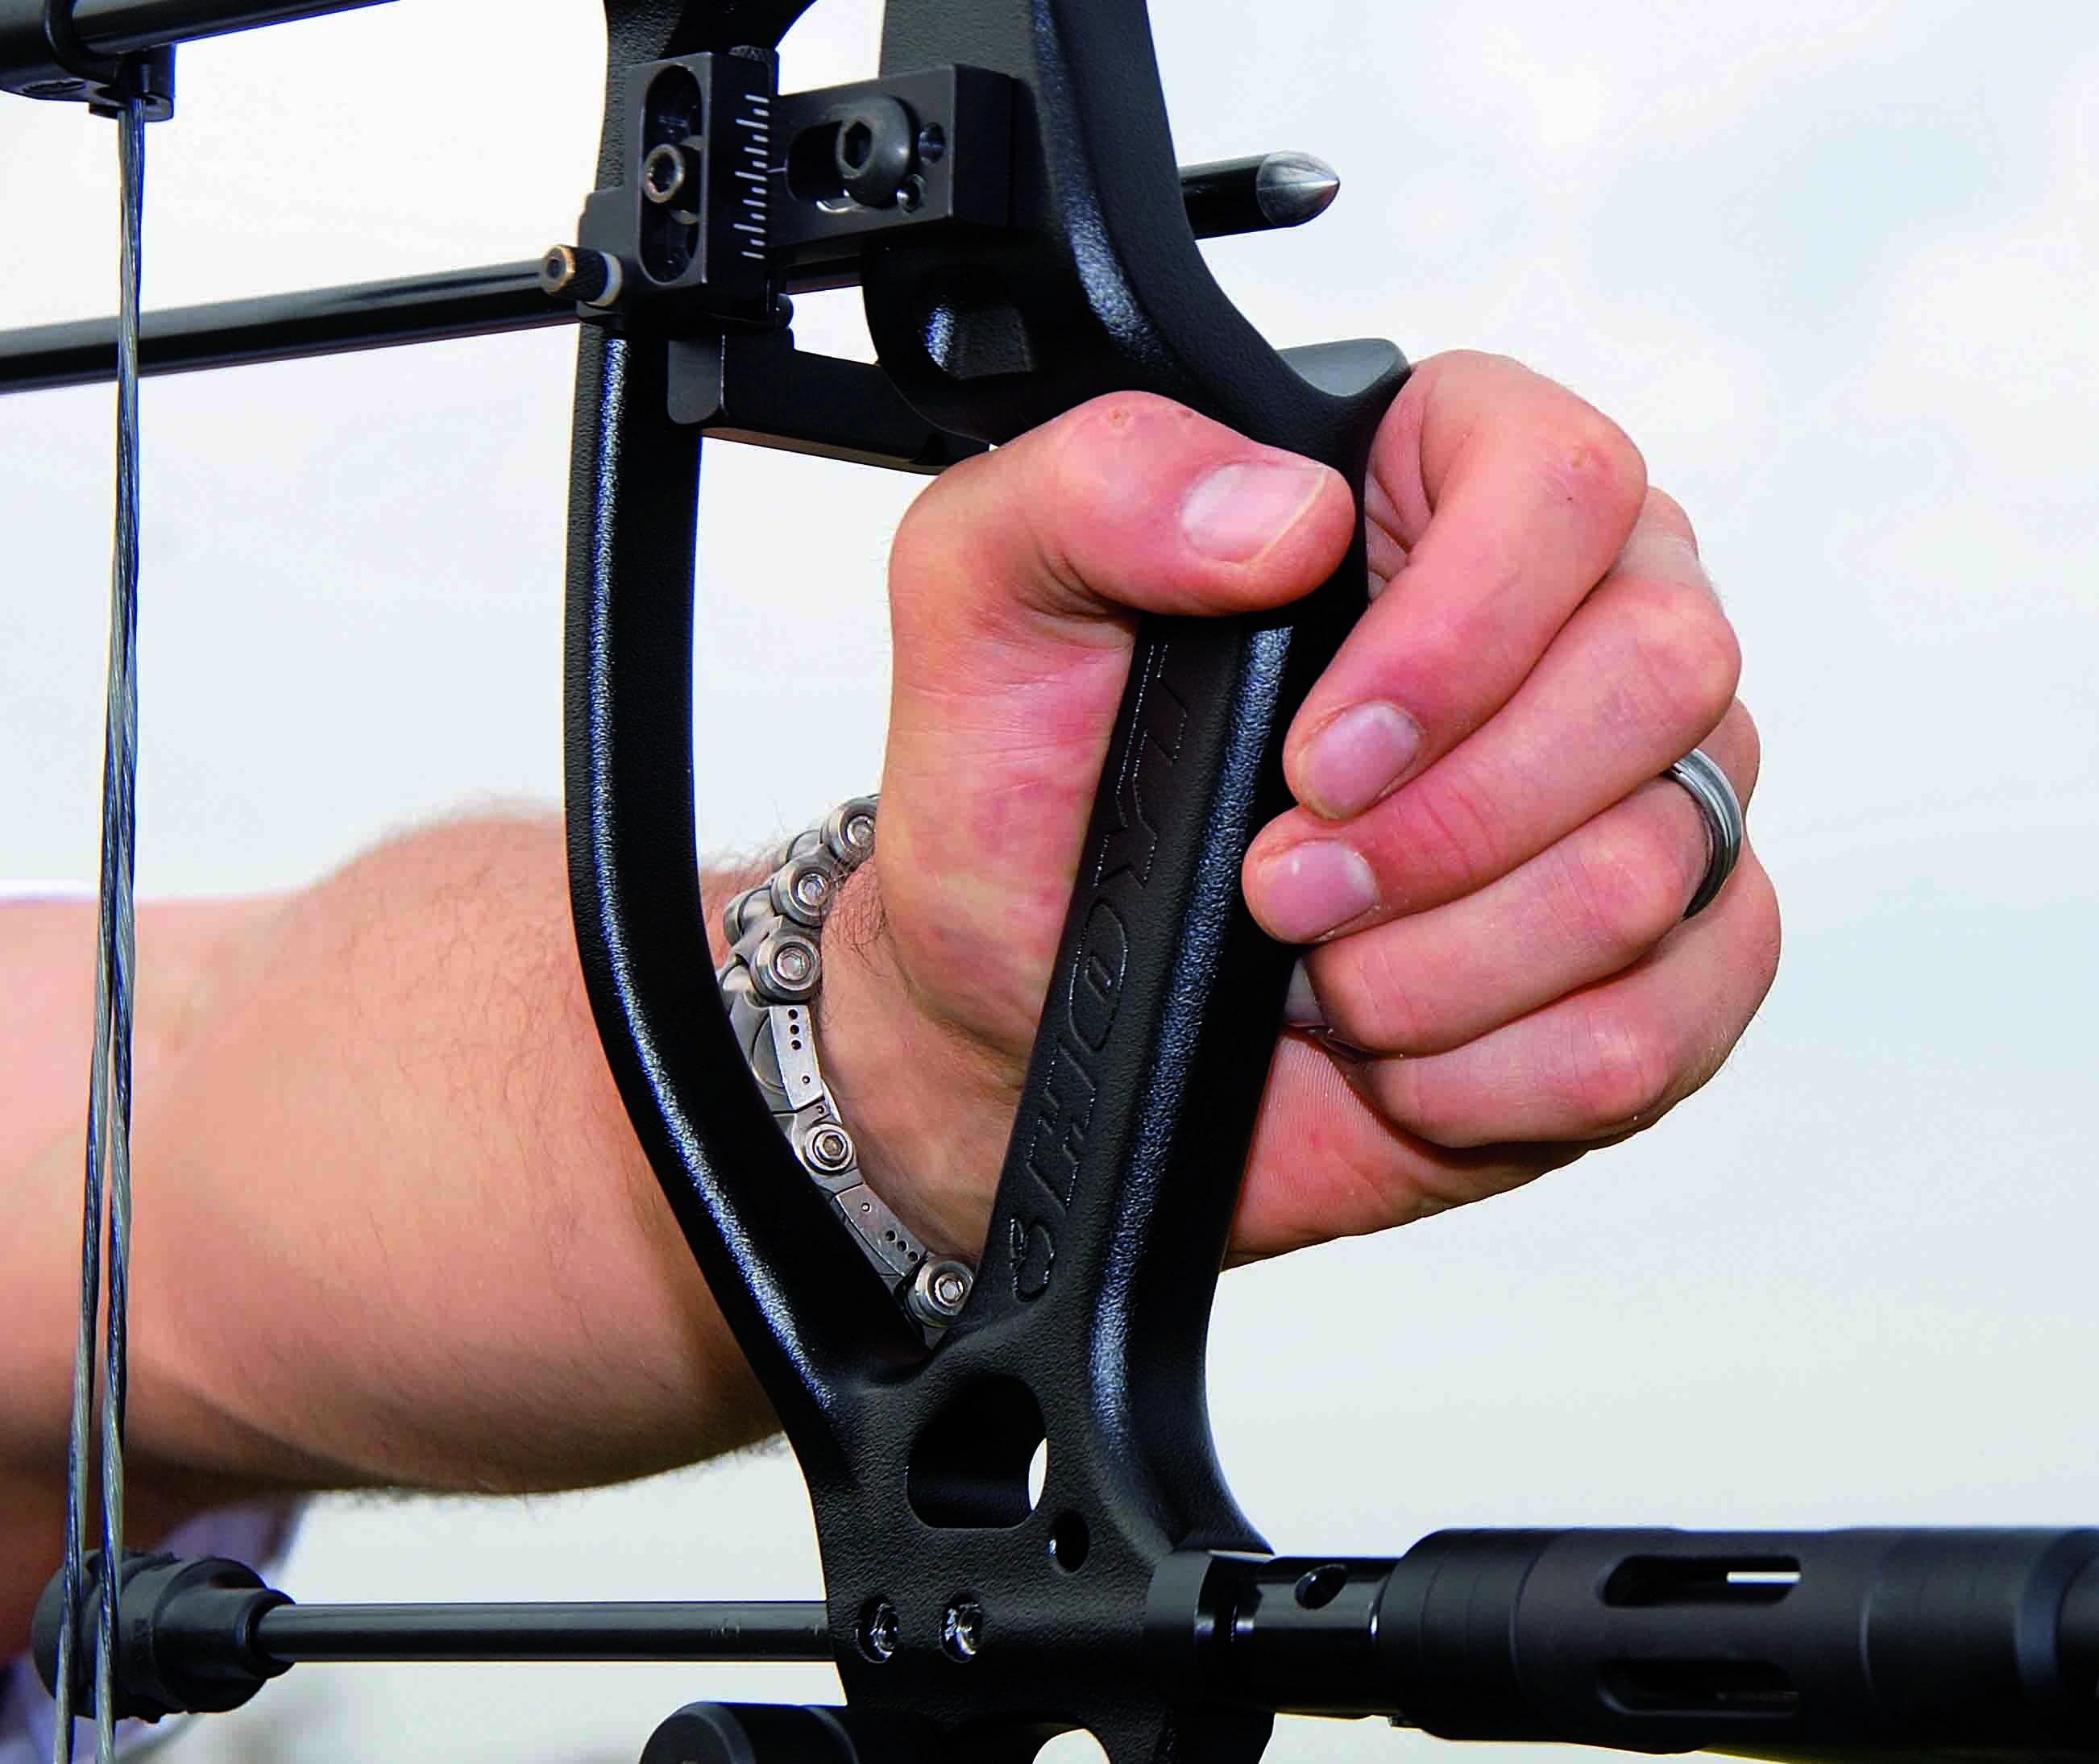
Keeping your hand totally relaxed is key to a good shot
Concentrate on clearance
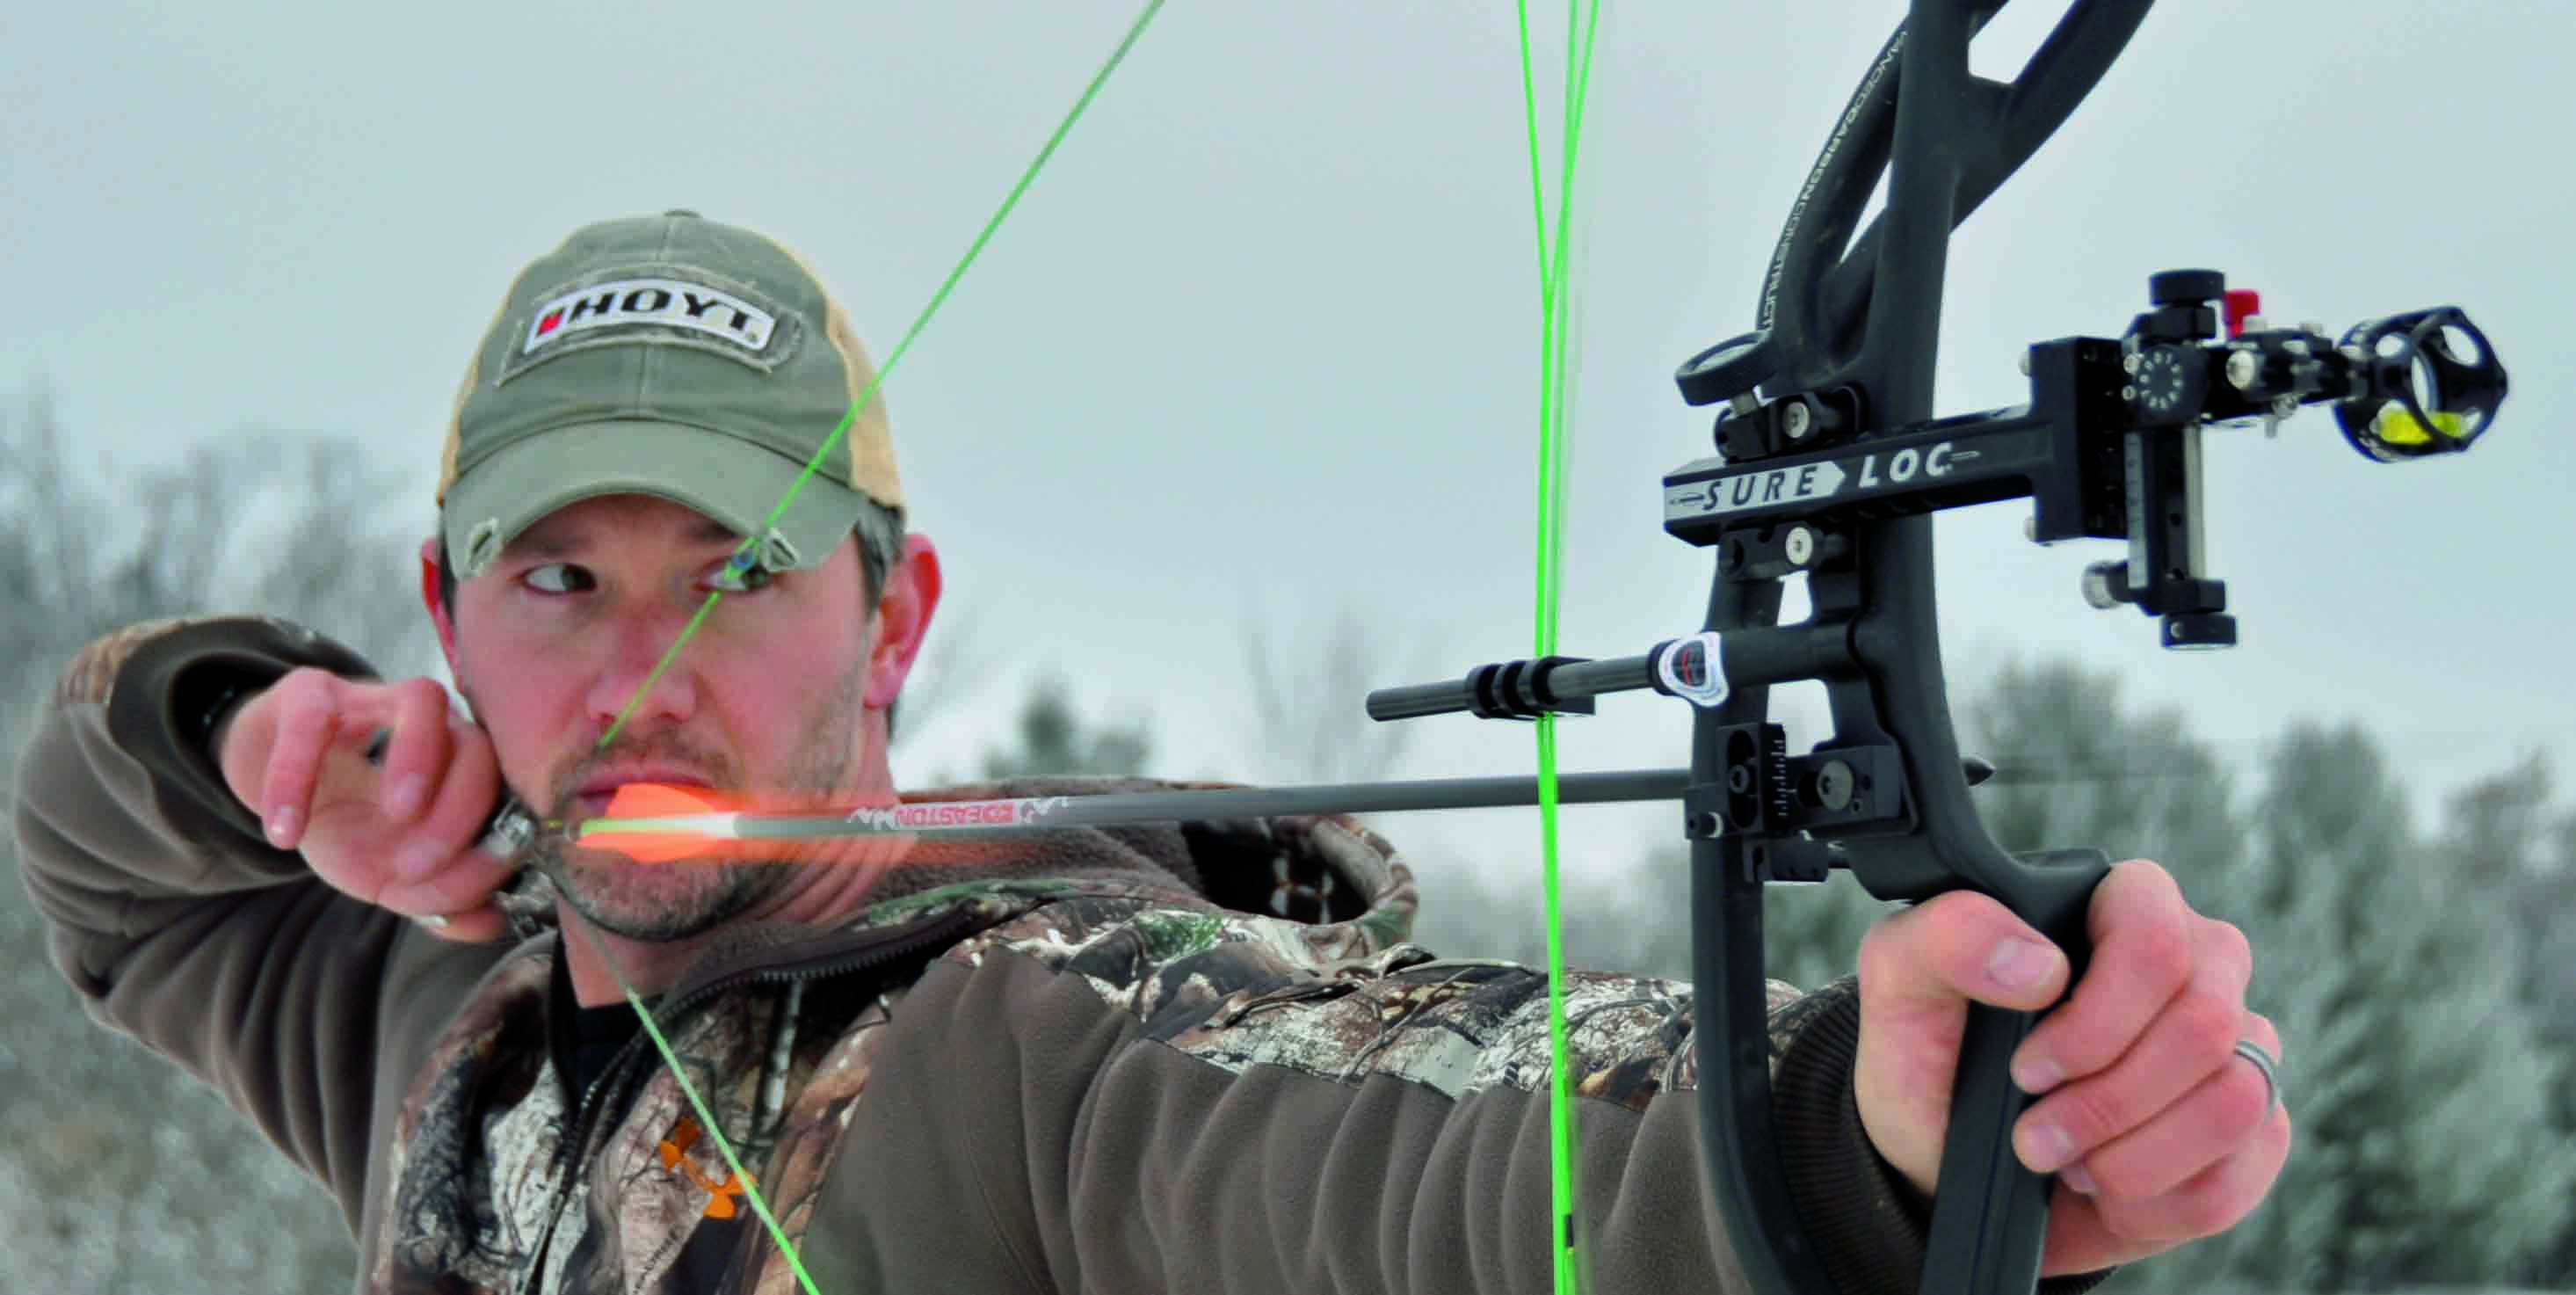
Another common mistake is to have contact on your string, fletchings, or arrow shaft because of too much facial pressure. For years, I fought with getting bows to shoot with perfect arrow flight. Luckily David Stepp, a good friend of mine, worked with me on reducing the pressure on the arrow and string while at full draw. I couldn’t believe how much it improved my center shot alignment, and most importantly, my arrow flight and grouping. This is sometimes tough for people who naturally have more facial tissue or full beards. However, you need to do your best on this. The basic rule of thumb is to draw the bow back until it stops and then learn to bring your release hand over to the side of your face. Many people draw the bow with the release hand under the jaw and then bring the release hand up and under, which can put pressure on the top of the string and arrow. If you can do this the same each and every time you may get away with it, but if you vary it in the slightest you will suffer in consistency.
Instead, teach yourself to draw the release hand back in line with your face, and when the bow stops, bring the release over to the anchor position without setting skin on the string or shaft. Feel the string and feel your anchor but don’t press into them. In addition, you should also be mindful of the distance between your face and the fletchings on your arrows. If you fletch them too close to the back of the shaft, the vanes will be settling against your chin at full draw. You don’t want that! Take a photo of yourself from the side to make sure that you can see all of your string, and that the fletches are not touching your face or chin.
Finish what you start
The last key tip I want to give you is to make sure you finish what you started. I am referring to your shot execution. There are fractions of a second in a shot cycle that can add up to big points. Those fractions of a second are when the release is first fired. A common mistake is to shoot and want to watch, and this is what I refer to as ‘quitting the shot’. By doing this you are increasing the potential for the arrow to be given misdirection from the release hand. Those of you who have shot off your fingers understand the importance of finishing the shot and following through.
What I like to teach is to continue to build pressure, and pull until you have that release fire by surprise. Then, as the release fires, you need to consciously focus on continuing to contract the bicep muscle to help pull the elbow back and bring the release hand back and over the rear shoulder. This motion keeps the release hand from firing down or away from the face. Both of these are common, but have negative effects on accuracy. Once again I speak from experience here, and thankfully another friend helped me through this one as well. Thanks Fred!
As the release fires, contract the bicep to pull the hand back and over the shoulder
To finish what you start just focus on using your back muscles for driving the elbow back to the wall behind you until the release fires. Then, you should instantly contract that bicep muscle to help pull your release hand straight back from the face and bring the release hand over the rear shoulder. I am continually asked if some of the top shooters with very dynamic ‘explosive releases’ are for real. The answer is most of it is for real, but there is a certain part of it that is an exaggerated motion to help assure them the shot is finished and the release hand came back and around properly. Looking impressive is one thing, but they are doing it right and for a reason!
It is amazing how many times I find myself struggling for the most basic of reasons. These five things are definitely several of the easiest mistakes to make, but what is important is that you recognise them sooner rather than later. Often, not recognising one mistake will lead you to make another without knowing it. Focus on these five key form flaws and you will be at your best again soon enough. Shoot well my friends!
When your bow arm is relaxed with a straight arm your arm still isnt dead straight. I know archers who say your bow arm should be straight or they say bone to bone but I think that would be hyper extended .I have found that if you straighten your arm then relax your arm has a slight bend .it is hard to relax with a dead straight arm or locking your elbow in not every persons elbow will lock .men with fair size muscles can never straighten their arm its more an individual thing than one way should fit all imo.