
Ashe Morgan shows you how to get it right – every single time.
Learning how to tune your bow can feel like navigating through a minefield of settings which all affect each other. There are endless parameters you could change, but how do you know which ones you should change?
And in which order? Many intermediate or even advanced archers are left second-guessing whether their tune is correct.
I want to show you the simplest, most robust method to finally feel confident with your tune. I also want to give you a toolbox of tuning tests that you can use for years to come. A few are a little more involved, but once you’ve done them once or twice, they will quickly become second nature.
Let’s start by looking at why we’re tuning in the first place, and by setting some ground rules.
The goal of tuning
The point of tuning is to maximise your scoring performance. To do this we have to make sure of the following:
- The initial setup of the bow is adequate.
- The arrow and bow are correctly matched, with no clearance issues.
- The arrow leaves the bow straight, stabilises quickly, and has ‘clean’ flight with minimal wobbling.
- The setup gives you the best grouping, and any technical errors are minimised. This is what we call a ‘forgiving’ tune.
If points 1-3 are checked off, this should result in a tune that gets you very close to the most forgiving tune in point 4.
Tuning ground rules
These points ensure reliable tuning and should eliminate most bias.
- Warm-up properly and don’t tune in the wind.
- Arrows must be immaculate and identical; no torn fletches, dinked nocks, different components, or bent points.
- Shoot with the equipment you intend to shoot with. Don’t tune with an old string and old tab, but then compete with a new string and new tab.
- For bareshaft tuning, shoot a minimum of 3 bare and 3 fletched arrows.
- Alternate your bare/fletched shafts. For example, don’t shoot all your fletched arrows first, then all your bareshafts afterwards. You’ll be more tired for your bare-shafts than you were for the fletched arrows.
- Only bareshaft tune to a maximum distance of 30m. Why? When tuning, we want to see the primary reaction of the bare-shaft. Once the bare-shaft goes past 30m it enters a secondary reaction; this reaction can often be misleading and cause you to make incorrect adjustments. 30m is more than enough for a basic tune.
- Check your bareshaft tune at more than one distance. Good choices are 18m and 30m. If you need the target closer, try 15m and 25m.
- When tuning, pick a target size that you can score 340+ on for 36 arrows.
- Use multiple tests (see below) to check your tune.
- Change one thing at a time. Advanced archers should confirm your final tune by repeating it multiple times, and on multiple days.
Before we begin, let’s clear up one last thing. You should NOT use your pressure button (plunger) to move the bareshaft into the group. This is by far the most common mistake archers make.
The location of the bareshaft is one indicator of whether the arrow is bending the correct amount and is matched to the bow. If you adjust the pressure button to move the impact of the bareshaft, you might make the arrow appear tuned, but you haven’t changed any physical characteristic of how the arrow is bending. This is fake tuning.
Now we’ve established some basics, let’s look at our tuning toolbox.
The tuning toolbox
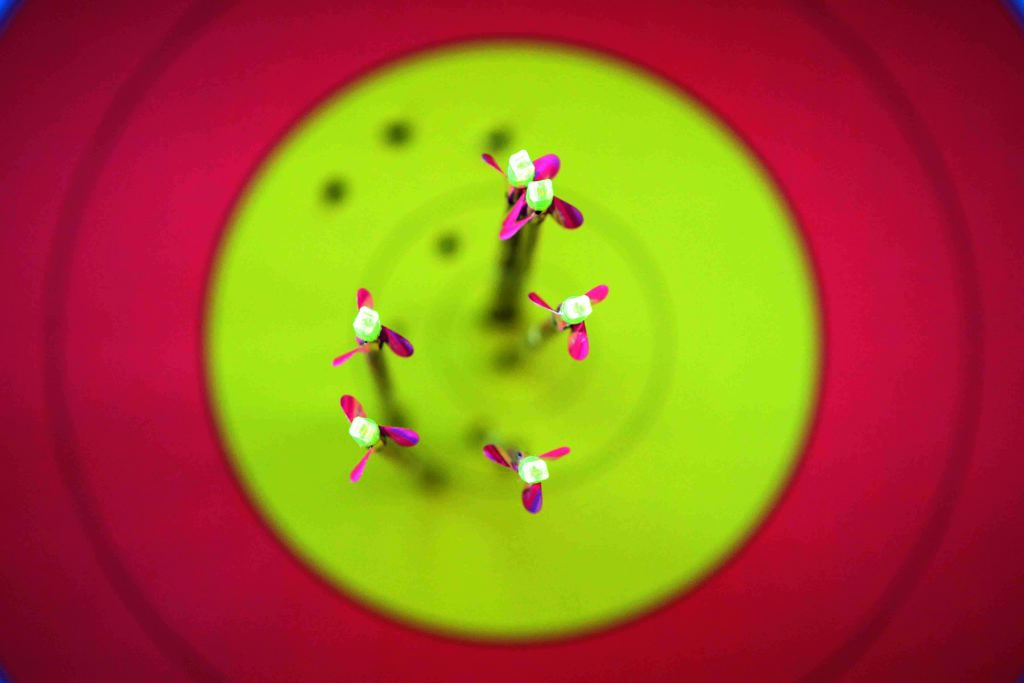
Bareshaft position (15-30m)
Procedure: The classic test. Shoot fletched and bareshaft arrows and compare relative impact points on the target.
What it tells you: If the bareshaft is below the fletched, the nocking point is too high. If the bareshaft is left of the fletched arrows then the arrow is reacting stiff (for a right-handed archer – the reverse for left-hand).
Watch out for: If results at different distances conflict, this could indicate a false tune or clearance issue.
Close impact angle (0-10m)
Procedure: Stand as close to a target as you can (stabiliser almost touching). Aim at a flat angle and shoot some bareshafts. Observe the angle of the arrow in the target.
What it tells you: A consistent, large impact angle can indicate arrow tune. If the nock is high relative to the point, this can indicate your nocking point is too high. If the nock is to the right (RH archer) this can indicate a stiff arrow.
Watch out for: false readings caused by straw targets. This test is best with foam. Check the result by taking a step back and repeating it. Do this a couple of times up to a max of 10m.
A small horizontal impact angle can be normal, especially if it oscillates left and right as you step back from the target; this would just indicate the normal bending of the arrow. You’re looking for a large, consistent angle in one direction.
Distance impact angle (15-30m)
Procedure: Observe the impact angle of the fletched and bare-shaft tests between 15-30m.
What it tells you: If the bareshafts impact with the fletched, the impact angle can indicate that a slight centreshot adjustment might be needed. If the bareshafts are not yet in the group, the impact angle can verify the tune. For example, a stiff bareshaft will land to the left of the fletched arrows, and be angled with the nock left.
Watch out for: The “distant impact angle” is normally opposite to the “close impact angle”.
For a RH archer, if the arrow is stiff it will leave the bow with the nock to the right of the point. This will then be observed on the “close impact angle” test, and you will also observe this in flight. However, when the arrow lands into the target at longer distances, it has normally corrected and lands with the nock to the left of the point.
Arrow flight observation (10-30m)
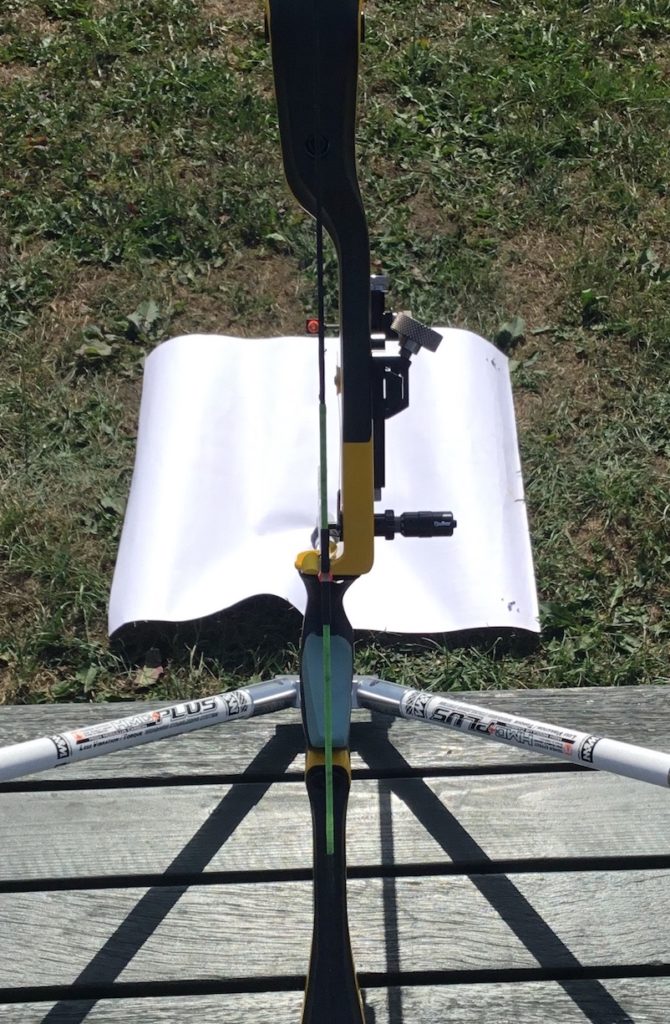
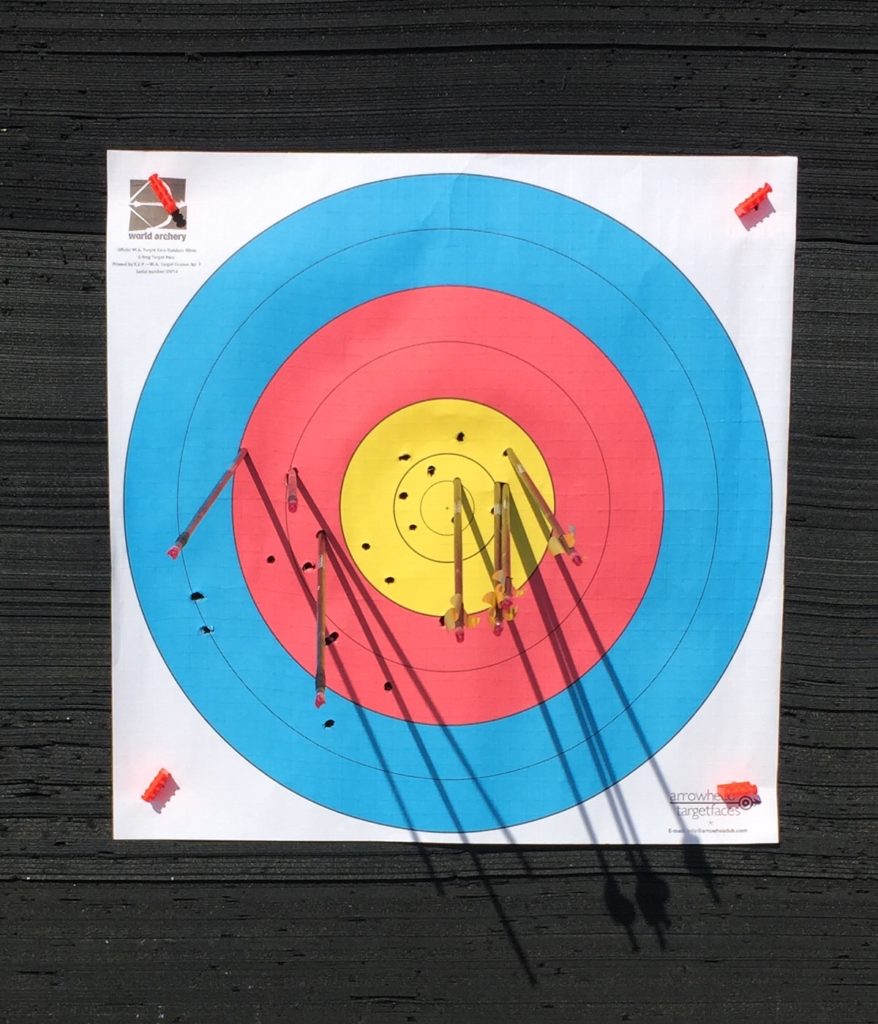
Procedure: Take a 122cm target face and pin it to the target with the white side facing you. Shoot alternating fletched and bareshaft arrows and observe the arrow flight. Doing both 18m and 30m works great for this.
What it tells you: Confirming the tune of the arrow. If the flight is good but there is an angle as the arrow travels, this can indicate that a centreshot adjustment is needed.
Watch out for: Make sure you differentiate whether you’re seeing the first or second reaction of the arrow. The crossover is normally around 20-30m.
Stage 1 – setup
Here we will assume you’ve done the basic setup of your bow already. Make sure of the following:
- You’ve aligned your limbs.
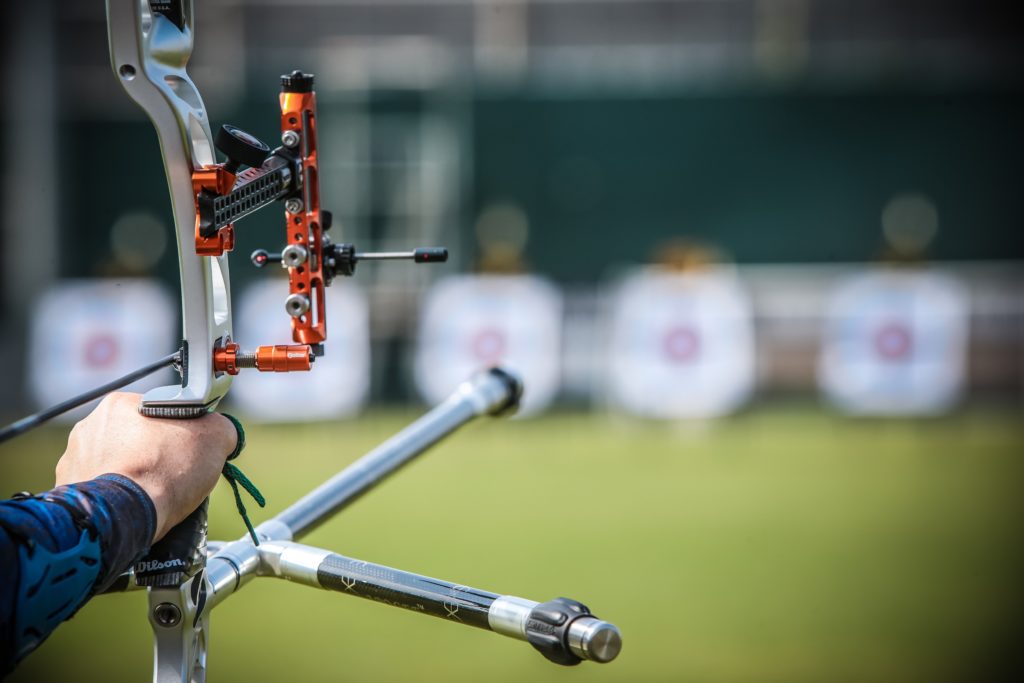
- Your centreshot is roughly set as shown in Fig. 1, about half an arrow shaft to the left.
- Your nock fit is good (see pages 16-17)
- Your button is set to medium pressure (5.0-6.0 for the standard spring in the Beiter button). It should be firm but easily compressed.
Stage 2 – initial check
This stage is about getting a reliable read of where your tune is. Do the following:
- Check your bareshaft position at 2 distances. Remember to follow our ground rules.
- Check the bareshaft close impact angle as described previously. Make sure the readings match up. If the bareshaft lands low and left at 30m then it should also land low and left at 18m. The close impact angle should also match, which means in this example that the arrow should be angled with the nock high and to the right of the point.
If you don’t have matching results for the tests then this could indicate clearance issues or a false tune.
Stage 3 – adjust the nocking point
This is perhaps the golden rule of tuning: always start with vertical corrections. Changing the nocking point height can affect how stiff or weak the arrow reacts, and it can even solve some clearance issues, so it’s important to do this first.
- Let’s continue using the example of the bareshaft landing low and to the left at 30m (as above).
- First, you would move the nocking point down, this would move the bare-shafts up.
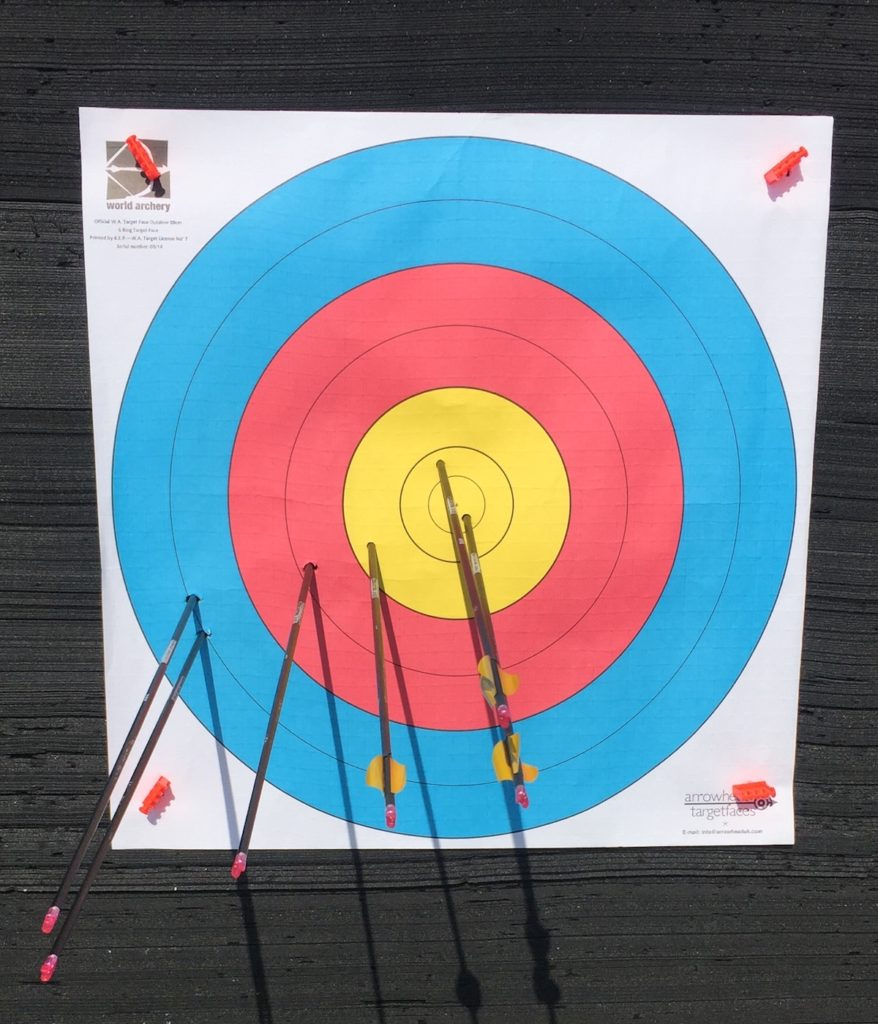
- Repeat Stage 2 to confirm the adjustment has worked. The bare-shafts should be level with the fletched as shown in Fig. 3 above.
- If you alter the nocking point but the bareshaft height doesn’t change, this can be another indication of clearance issues or a wildly mismatched arrow.
Stage 4 – begin the basic tune
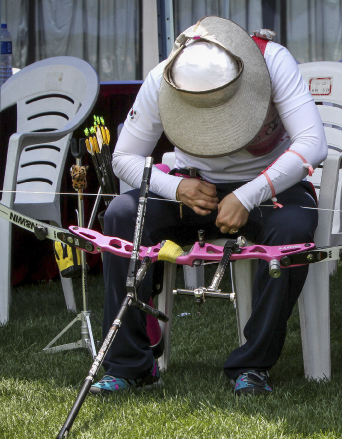
Now it’s time to bring the bare-shafts in. Make sure your bow’s tiller bolts are marked as shown in Fig. 4. This allows you to change your poundage and reset it easily afterwards.
- Use this process to bring your bareshafts into the fletched group.
- Set up a 30m target as described in the “arrow flight observation” test. Place an aiming spot in the middle.
- Shoot a minimum of 3 bareshafts and 3 fletched arrows. Watch the arrow flight and note where the bareshafts impact.
- Adjust your poundage using the tiller bolts. If the arrows are stiff, wind the bolts in 1 turn. If the arrows are weak, wind the bolts out 1 turn.
- Repeat steps 2 and 3 until you have the bareshafts in the group with the fletched.
- Confirm the result at 18m.
- If your arrows are stiff, then adding poundage should weaken them. If you add poundage and the arrows appear stiffer this is a tell-tale sign that your arrows were giving a false tune because of clearance issues.
- If you have clearance issues or a false tune, you’ll likely either need a different spine of arrow, or you’ll need to adjust your poundage a large amount. Use your tiller bolts to bring the tune as close as possible. Clearance issues are often caused by technique, but that’s an entire subject for a different day.
Stage 5 – finalise the basic tune
Next, reset your poundage back to what you intend to shoot. Now, we’ll adjust your arrows to the poundage.
- As an extremely rough rule you can use the following: 5LBS = 1 INCH = 1 SPINE
- Let’s say your arrows were weak and you lowered the poundage by 2.5lbs in Stage 4. You could achieve roughly the same result by cutting your arrows by 0.5” (from the front), or getting an arrow 0.5 spines stiffer.
- Obviously, you can’t get an arrow which is half a spine stiffer. In this case, you could maintain your poundage, get an arrow which is one spine stiffer, and also cut the arrow 0.5” longer than the previous arrow. Overall this could have approximately the same effect.
- You can see how using this rule can give you options to achieve your tune. It goes without saying though, this is to be used as a very rough guide only. The key here is that you pick your poundage, and adjust the arrow to the bow. You don’t use your pressure button.
- Once you’ve got the arrow very close, you can change the poundage a small amount to do the final adjustment. No-one likes cutting arrows down by 3mm; it’s much easier to fine-tune the poundage.
Stage 6 – button tension/centreshot
To iron out any adjustments you need to make to your button, you can follow this simple process:
- Set up a 30m target as described in the “arrow flight observation” test.
- Shoot alternating fletched and bareshafts and watch the flight.
- If you see the arrow ‘wobbling’ left and right, adjust the button pressure slightly to eliminate the wobble.
- If you see the arrow is stable and flying well but is slightly ‘angled’ in flight, adjust your centreshot by a tiny amount to straighten the arrow.
Stage 7 – arrow selection
I cannot stress this enough: once you have even a basic tune, having a consistent set of arrows is much more important than doing any fine-tuning. I see so many archers spend days on tuning and then spend no time selecting their arrows for consistency.
Do this to select your arrows:
- Pick a distance and target face combination where you can shoot 340+ for 36 arrows.
- Shoot your entire set of arrows as bareshafts.
- They should all comfortably land in the gold. Take out any that keep missing the gold.
- Check these arrows for damage. Replace the nock and check again. If that doesn’t work, re-glue the point and check again. If that doesn’t work put a new point in. If that doesn’t work then it’s just a bad arrow. Make a note and don’t shoot it in competition
- From a dozen arrows, you will often get one or two which don’t group.
Stage 8 – maintenance
Frankly, spending the time to tune your equipment and then shooting arrows with torn fletches and dinked nocks is unforgivable. If you compete with just a single torn fletch or inconsistent nock, you’ll be haemorrhaging points.
Make sure every single arrow, nock, fletch, and point is perfect. And don’t just wait for a competition to do this, you need to practice with good arrows so you get the correct feedback!
- Check your bare-shaft reading at least every fortnight and before any competition. This ensures nothing has changed without you realising.
- Repeat your arrow selection every month or so and definitely before any competition. This will help spot any arrows which may have been damaged in practice.
- Repeat the entire tuning process if you change any equipment or technique. This is particularly important if you change your grip or tab.
What is ‘false tuning’?
A false or fake tune is when the arrow is so mismatched that it appears to behave in completely the opposite way to what is happening. An arrow two or three spines too weak can hit the bow violently and appear to look stiff on some tests. This is why using multiple tests is important.
Final thoughts
Please, please, please, get your basic tune (which should be fairly quick) and then spend the rest of your time selecting and maintaining your arrows, and most importantly working on your technique. Don’t throw away your archery progress by endlessly tinkering with tuning!
Hello. Two Questions:
1. What is the primary and secondary reaction of an arrow? any page can view for more informaiton?
2. I dig this articles up by typing searching “Bareshaft tuning principle”. Actually, I am looking for the hypothesis behind the bareshaft tuning. Any articles I can read to understand more about “How and why bareshaft tuning is developed? (Not how we apply it in most articles)
2) I’m no expert but the vanes act as stabilizers thus improving the flight characteristics of the arrow by minimizing tuning issues or other factors that might impact the flight characteristics in a negative manner. Bare shaft tuning allows us to see the real arrow tune, which might get masked by the stabilizing action of the vanes.